Baking a Material
Video Tutorial:
Prerequisites
Before baking
- The object must be UV unwrapped with no overlapping faces.
- The Cycles render engine must be selected.
- Open the SBake tab within the Shader Editor's N panel.
Understanding UV Maps for Baking
If you're used to working with downloaded seamless PBR textures, you've probably set up UV maps that overlap or stack — that's fine for tiling textures because the pattern repeats and covers the whole surface regardless.
Baking is different. When you bake, every pixel of the 4K texture is a unique piece of your object's surface. If two faces share the same UV space, they'll fight for the same pixels and the result will be a garbled, overlapping mess.
| Seamless Texture Workflow | Baking Workflow | |
|---|---|---|
| UVs can overlap? | Yes — the texture tiles, so overlapping doesn't matter | No — every face needs its own unique UV space |
| UV islands | Can be stacked on top of each other | Must be laid out separately, like puzzle pieces |
| Common use | Floor tiles, brick walls, fabrics — anything that repeats | Unique surfaces, decals, hero assets, anything that doesn't tile |
Method 1: Auto-Populate (Recommended)
The fastest way to set up a bake. The engine automatically detects all map channels from your material.
- Select the object.
- In the SBake tab, click "Auto-Populate from Material".
-
The queue will be populated with all detected maps (Base Color, Roughness, Metallic, Normal, Alpha, Displacement). If the queue already has maps, a confirmation prompt will appear.
Multi-Slot Materials
If your object has multiple material slots, Auto-Populate will detect maps from all slots and show them with slot numbers like
[1],[2]. See the Multi-Slot Baking guide for details. -
Adjust the baking resolution, samples, and other settings according to your requirements. You can also enable additional features like Lighting, Mesh Maps, or ORM Packing in the settings section.
-
Click the "Bake" button. The button will change to "Baking..." during the baking process.
Note
The baking time depends on the resolution, sample count, and complexity of the material.
-
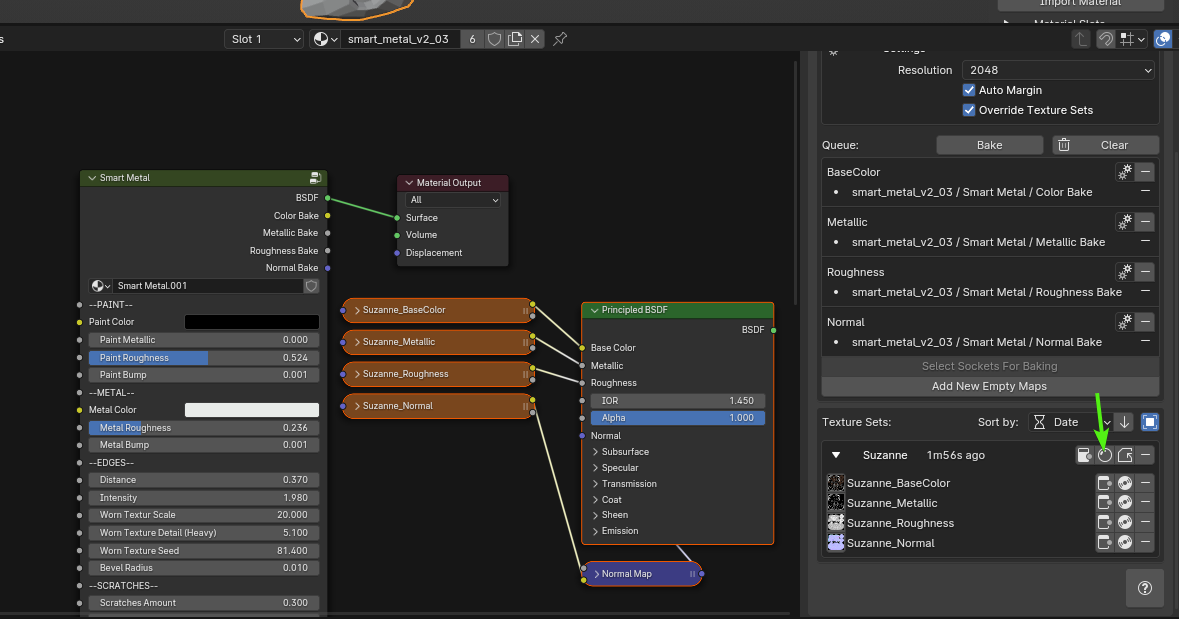
Once the baking process is complete, the textures will appear in the Texture Sets, ready for use. Click "Instantiate PBR setup" to create a quick node setup, prepared to replace the procedural material.
-
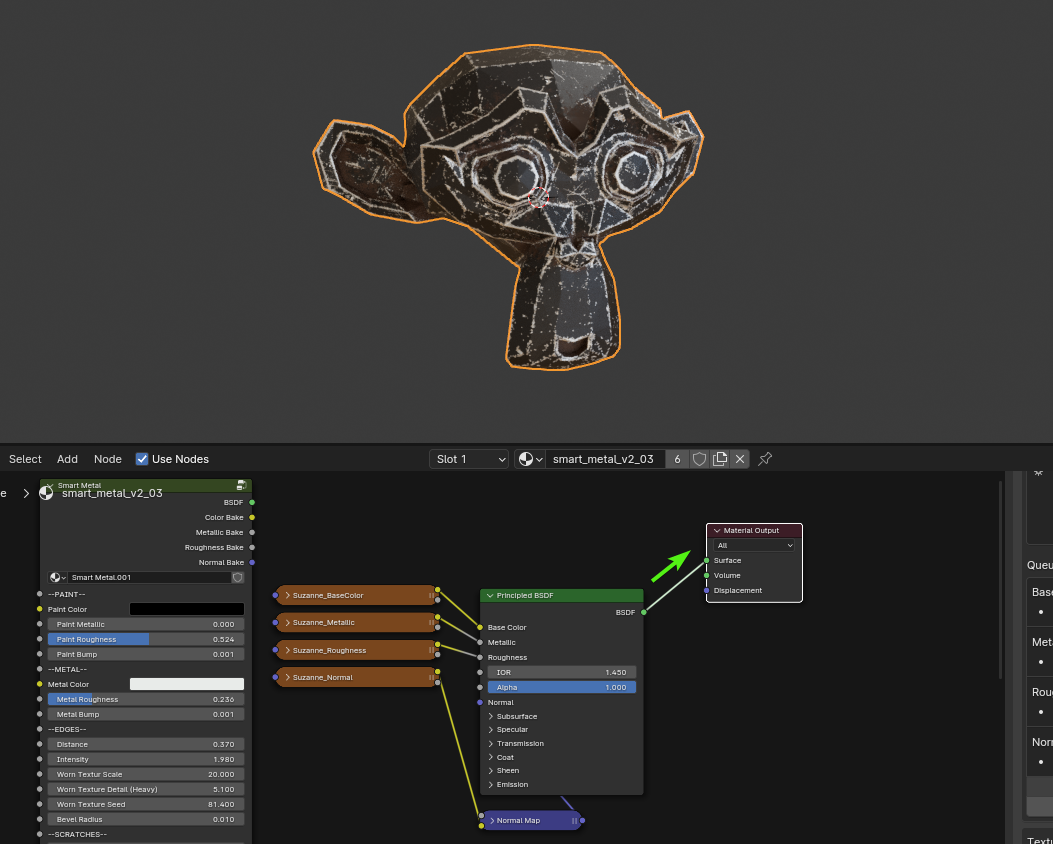
Connect the newly added Principled BSDF node to the Material Output node.
Method 2: Manual Socket Selection
Use this method when you want to bake specific channels or need fine-grained control.
- Select the object.
- Right-click the Node Group of the material you intend to bake.
-
Click "Select Sockets for Baking".
-
In the pop-up window, select the sockets you want to bake, assign them a MAP and click "OK".
-
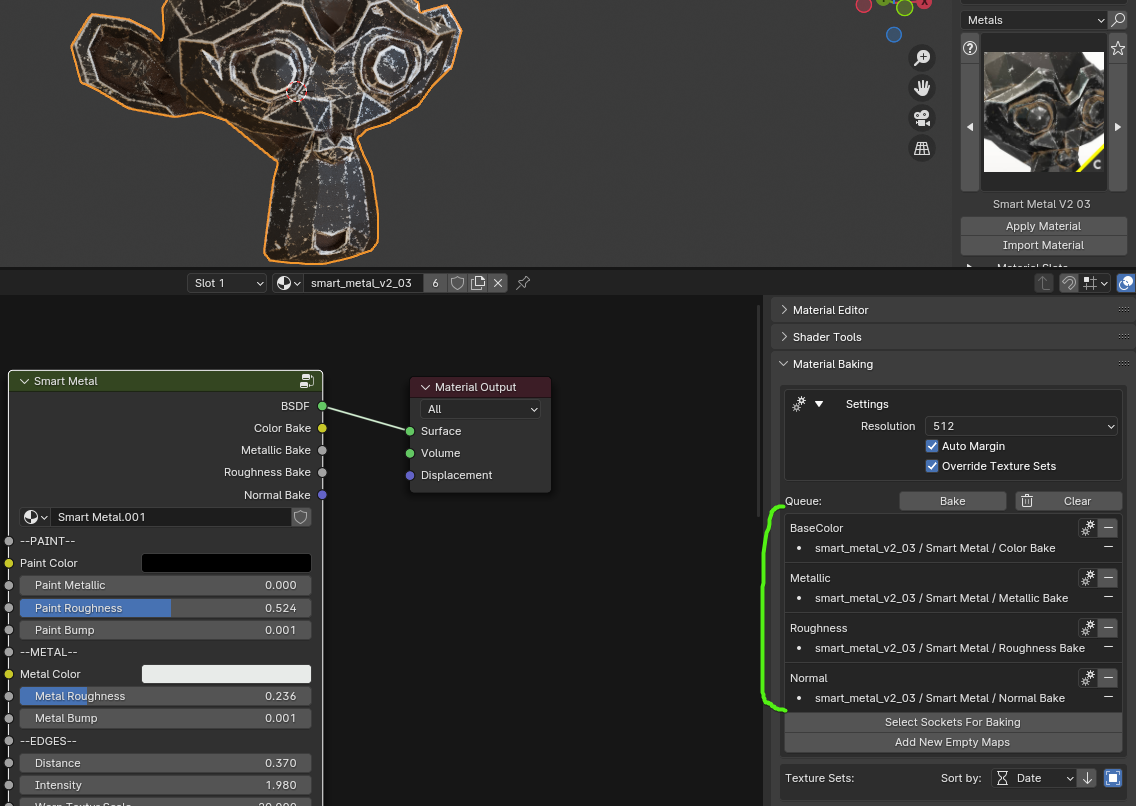
The selected sockets will be added to the baking panel.
-
Adjust the baking resolution, samples, and other settings according to your requirements.
-
Click the "Bake" button. The button will change to "Baking..." during the baking process.
Note
The baking time depends on the resolution, sample count, and complexity of the material.
-
Once the baking process is complete, the textures will appear in the Texture Sets, ready for use. Click "Instantiate PBR setup" to create a quick node setup, prepared to replace the procedural material.
-
Connect the newly added Principled BSDF node to the Material Output node.