How to use the Material Editor
Introduction
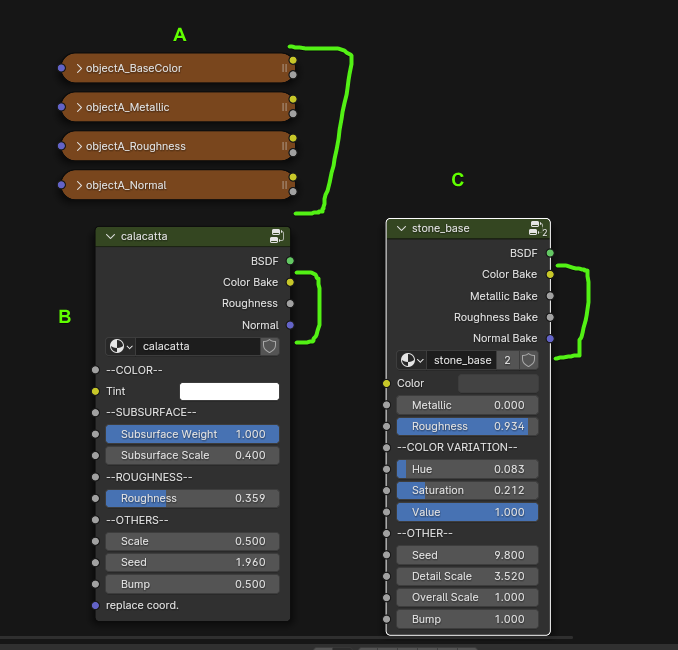
Each Module Group Node has Inputs and Outputs. On the inputs, you can plug the baking outputs of any bakeable procedural material from the library, a PBR material, or a base shader from the editor's "shaders" category of assets. Each module will take in Color, Metallic, Roughness, and Normal information, affect them in some way, and then output the new Color, Metallic, Roughness, and Normal information.
This way, the different modules can be ordered as layers to keep adding different details.
The Material Editor uses Cycles, since many Smart Modules are made using Cycles-only nodes. It is also needed in the baking process.
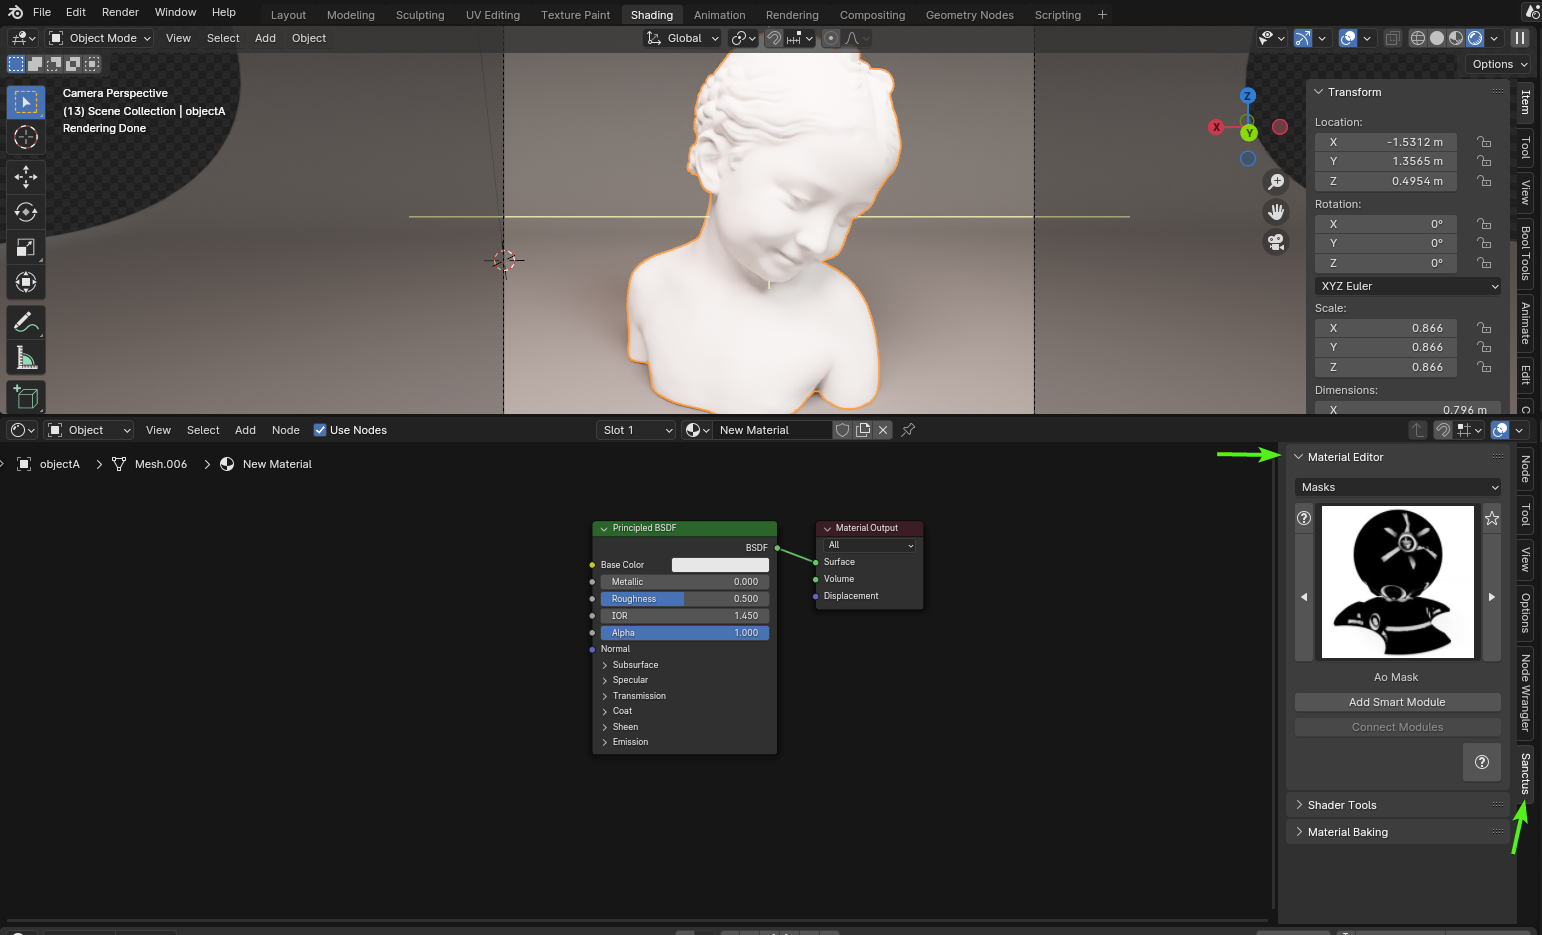
To start using the Material Editor, go to the Shader Editor, activate the N panel, and click the Sanctus Tab.
The Interface
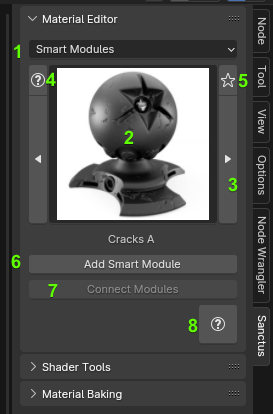
- Asset Categories
- Selected Asset
- Navigate to the previous and next asset in the current category
- Selected Asset Documentation
- Add the current asset to favorites (a new category called "My Favorites" will be added with all the favorited assets)
- Add the selected asset to the node editor
- Connects 2 or more selected Smart Modules / Texture Modules group nodes together using their current order in the X axis (from left to right).
- Material Editor documentation
Creating or Editing a Material
Select your starting point:
- A PBR Material
- A Procedural Material from the library
- One of the Base Materials from the Material Editor Shader category
Next, select a Smart Module or Texture Module to add the first layer. In this example, I will use "Cracks" in the Smart Modules category.
PBR textures have to be connected manually to the first Smart Module. To connect Smart Modules, put them in order, select them, and click the "Connect Smart Modules" button. They will be connected respecting the order from left to right. If you use a Procedural Material as your starting point, it is recommended to bake it before you add your layers, since they already have a good amount of nodes and can hit the limit faster.
You can change the order of the layers, select the ones that need reconnecting, and click "Connect Smart Modules" again.
Some Modules have a special input for masks. Here, you can use an image texture or one of the procedural masks in the "Masks" category of the Material Editor. The masks will change the regions where the effect is applied.
Node Limit
There's a limit of nodes that will render your material completely black. If this happens, you have reached it. This is a hardcoded limit in Blender. If you get to this limit, you can bake the last working layer/smart module and use that as a new start to keep adding layers.
At any point, you can connect the BSDF output of any layer to see the material up to that point.
Once your material is looking as you want, you should bake it, since the amount of nodes at this point will be really demanding. Baking Material Editor Materials