Using baked High-poly Low-poly normals (Advanced)
Even if the Baking Addon is specifically designed for baking materials exclusively. I created a GUIDE that can help you incorporate a baked high-poly to low-poly normal map.
Bake the High-poly to Low-Poly Normal Map
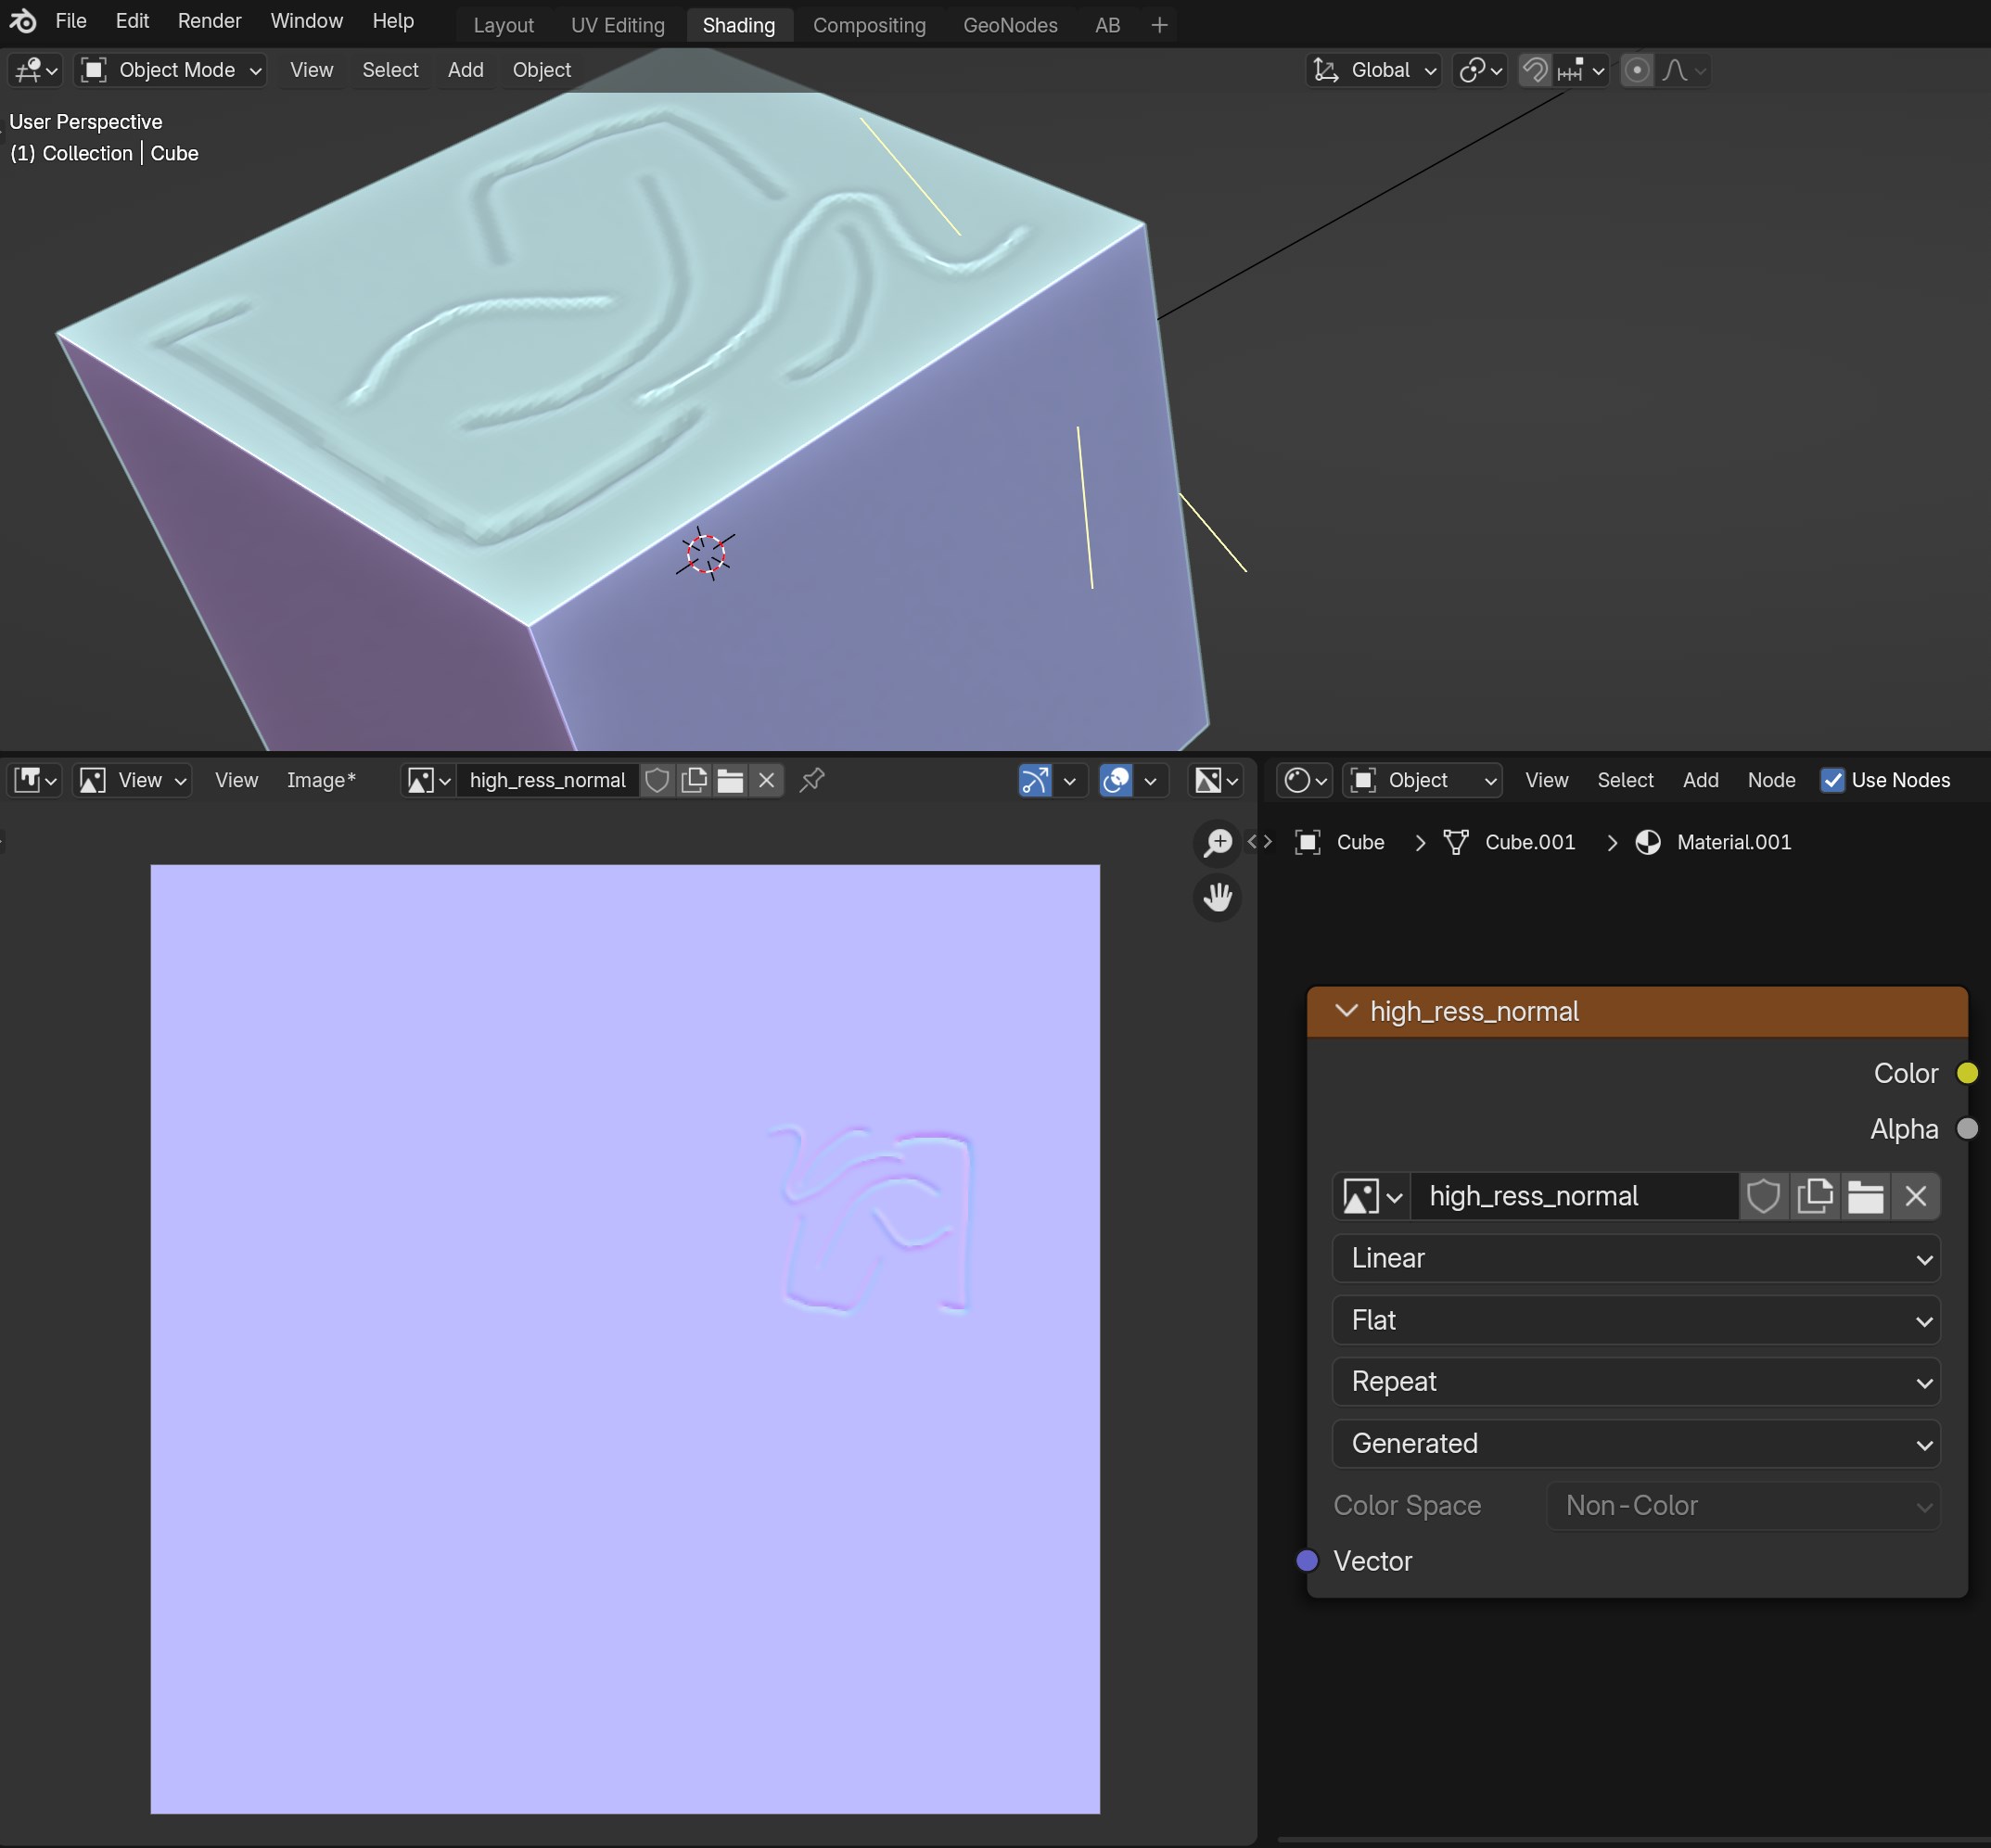
Bake your normal map with the high-poly details using Blender's native baking system. The example below uses a simple sculpted detail on a cube.
Combine Normals
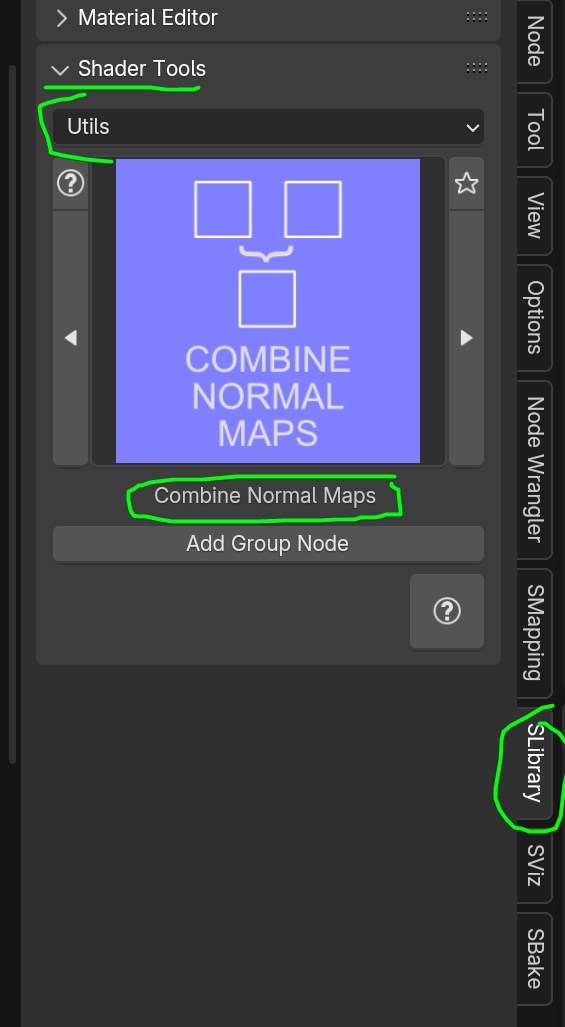
We will use a custom node included in Sanctus Library to combine your baked normal texture with the existing material normal. This allows you to create a procedural material that incorporates the high-poly baked normal map.
-
Access the node in the Sanctus Library > Shader Tools in the N panel.
-
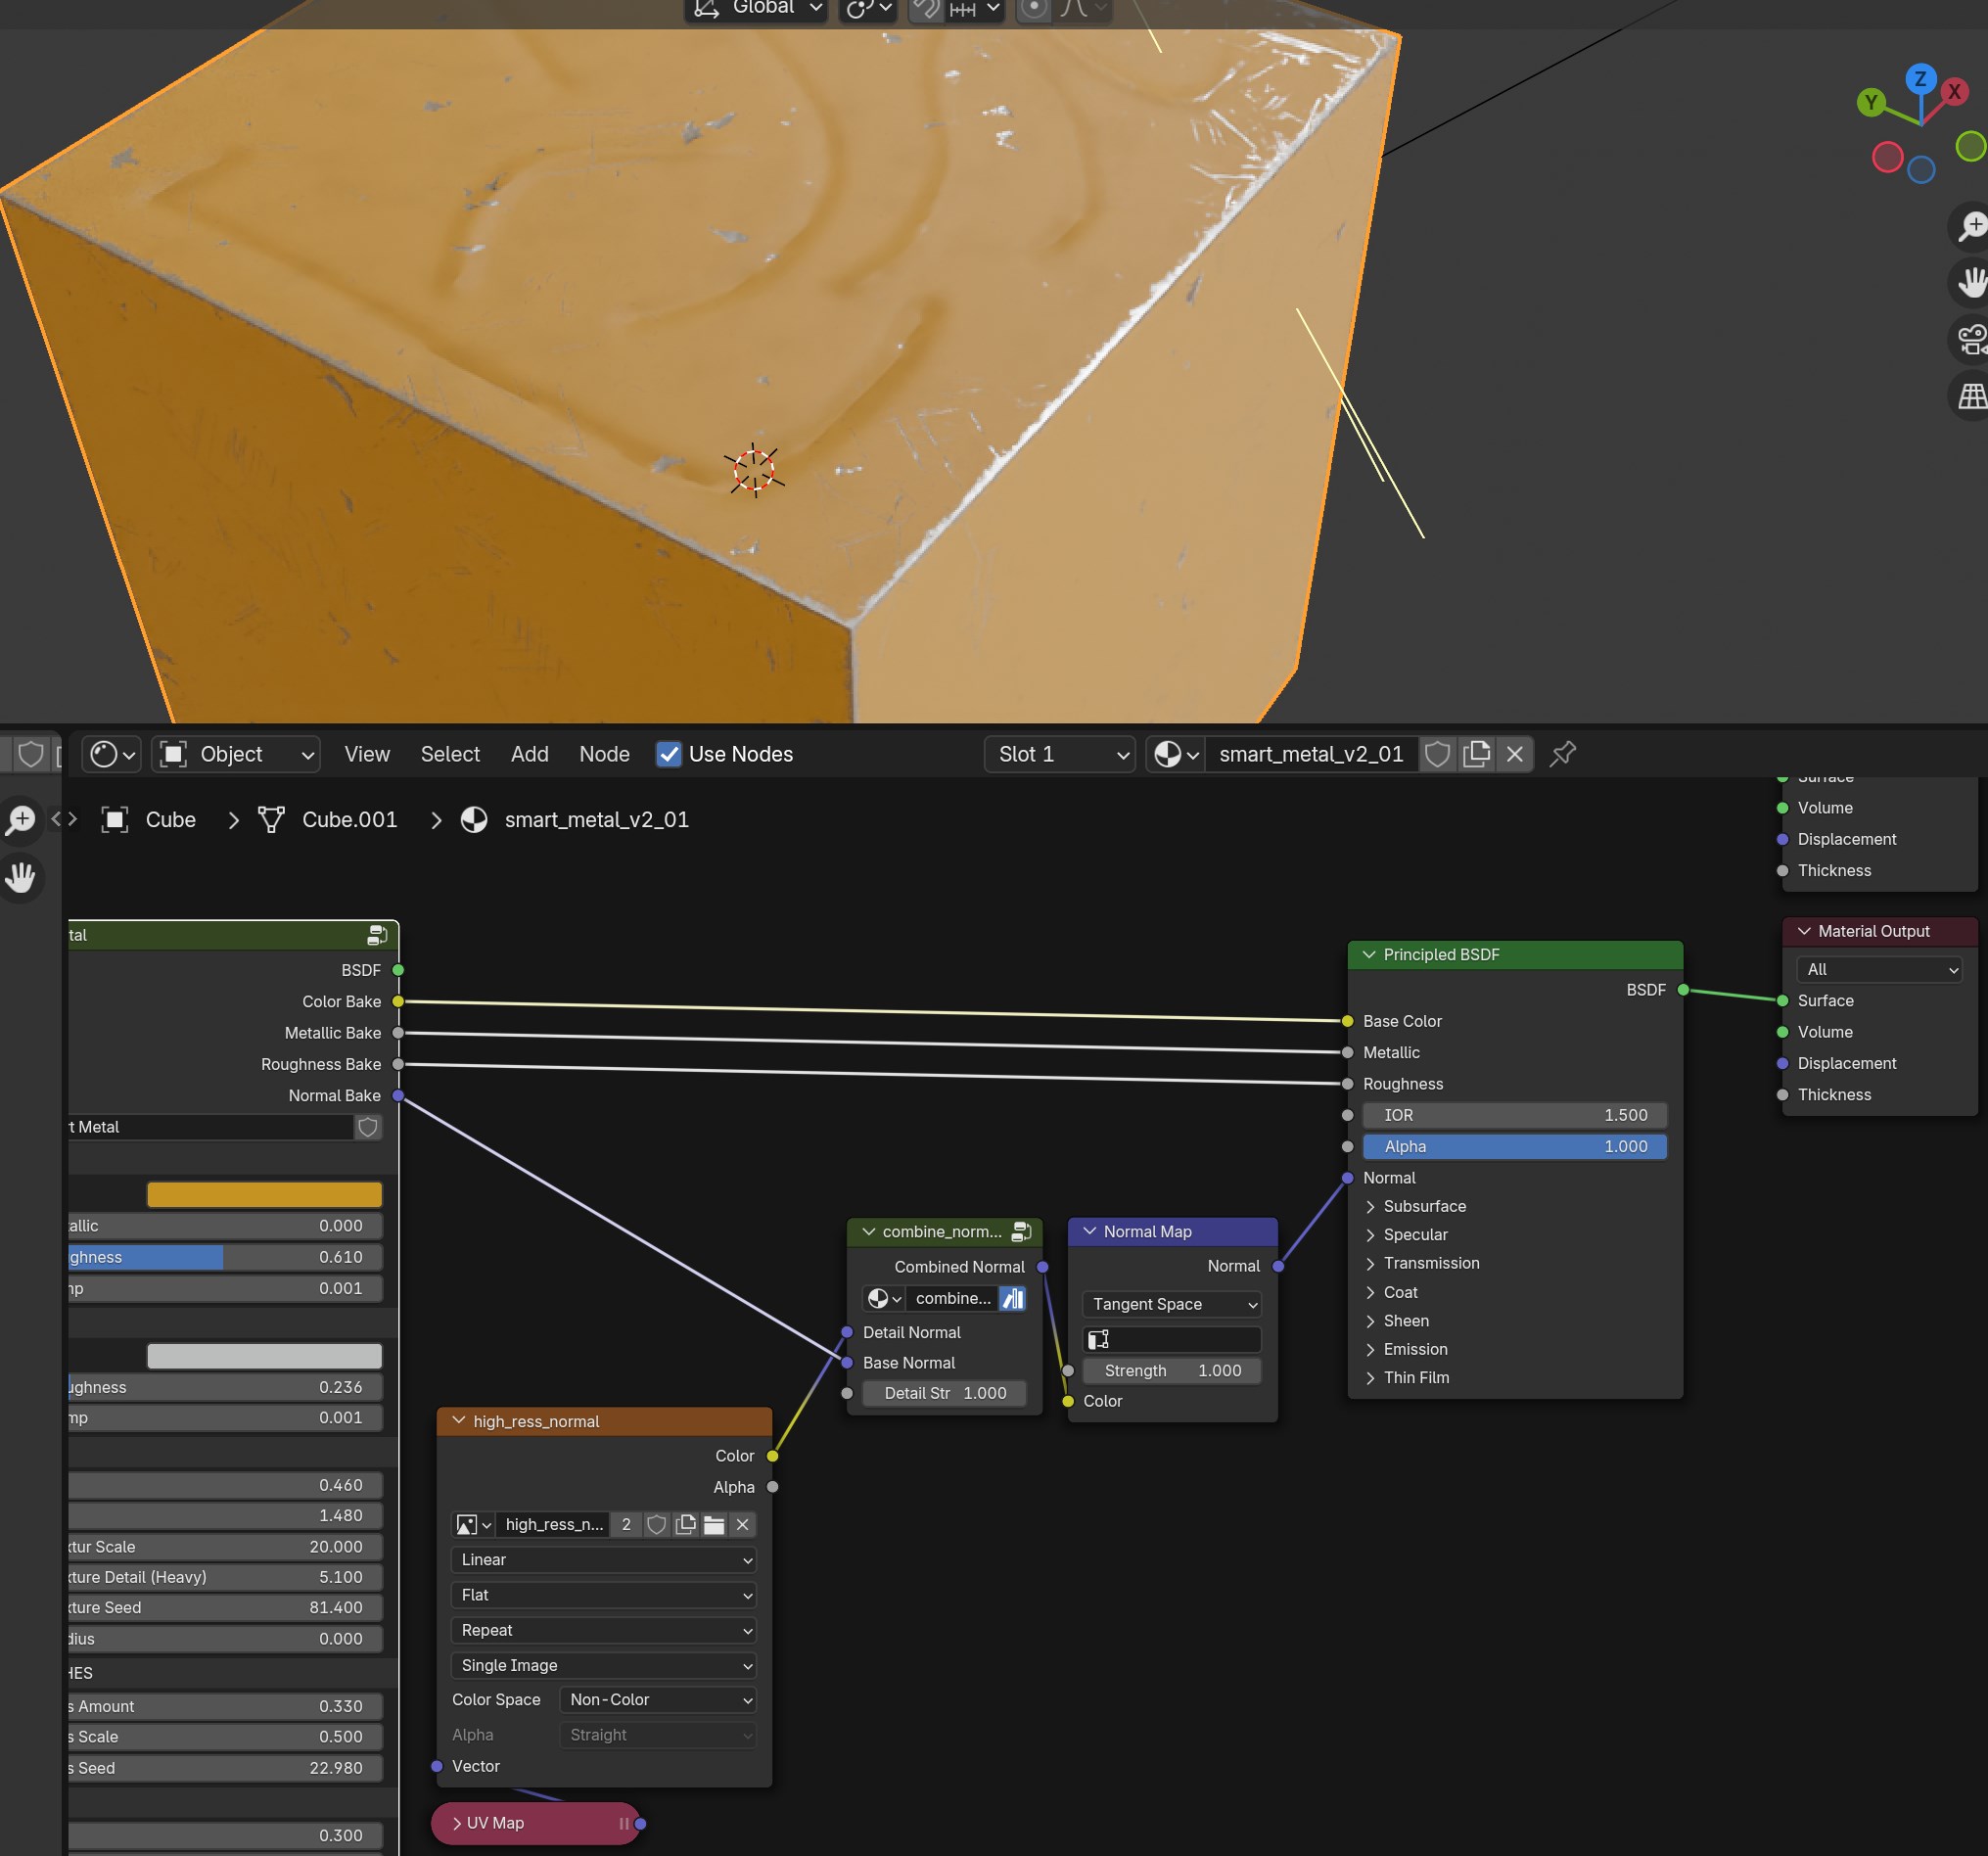
Connect the normal map from your material and the normal map from your image texture to the Combine Normal node.
The result is a low-poly cube with the procedural material and the high-poly normal details.
Baking using Sanctus Bake
You can also bake the combined maps into a single PBR texture set. The difference from a regular bake is that you will select Color, Metallic, and Roughness maps from the Procedural Group Node:
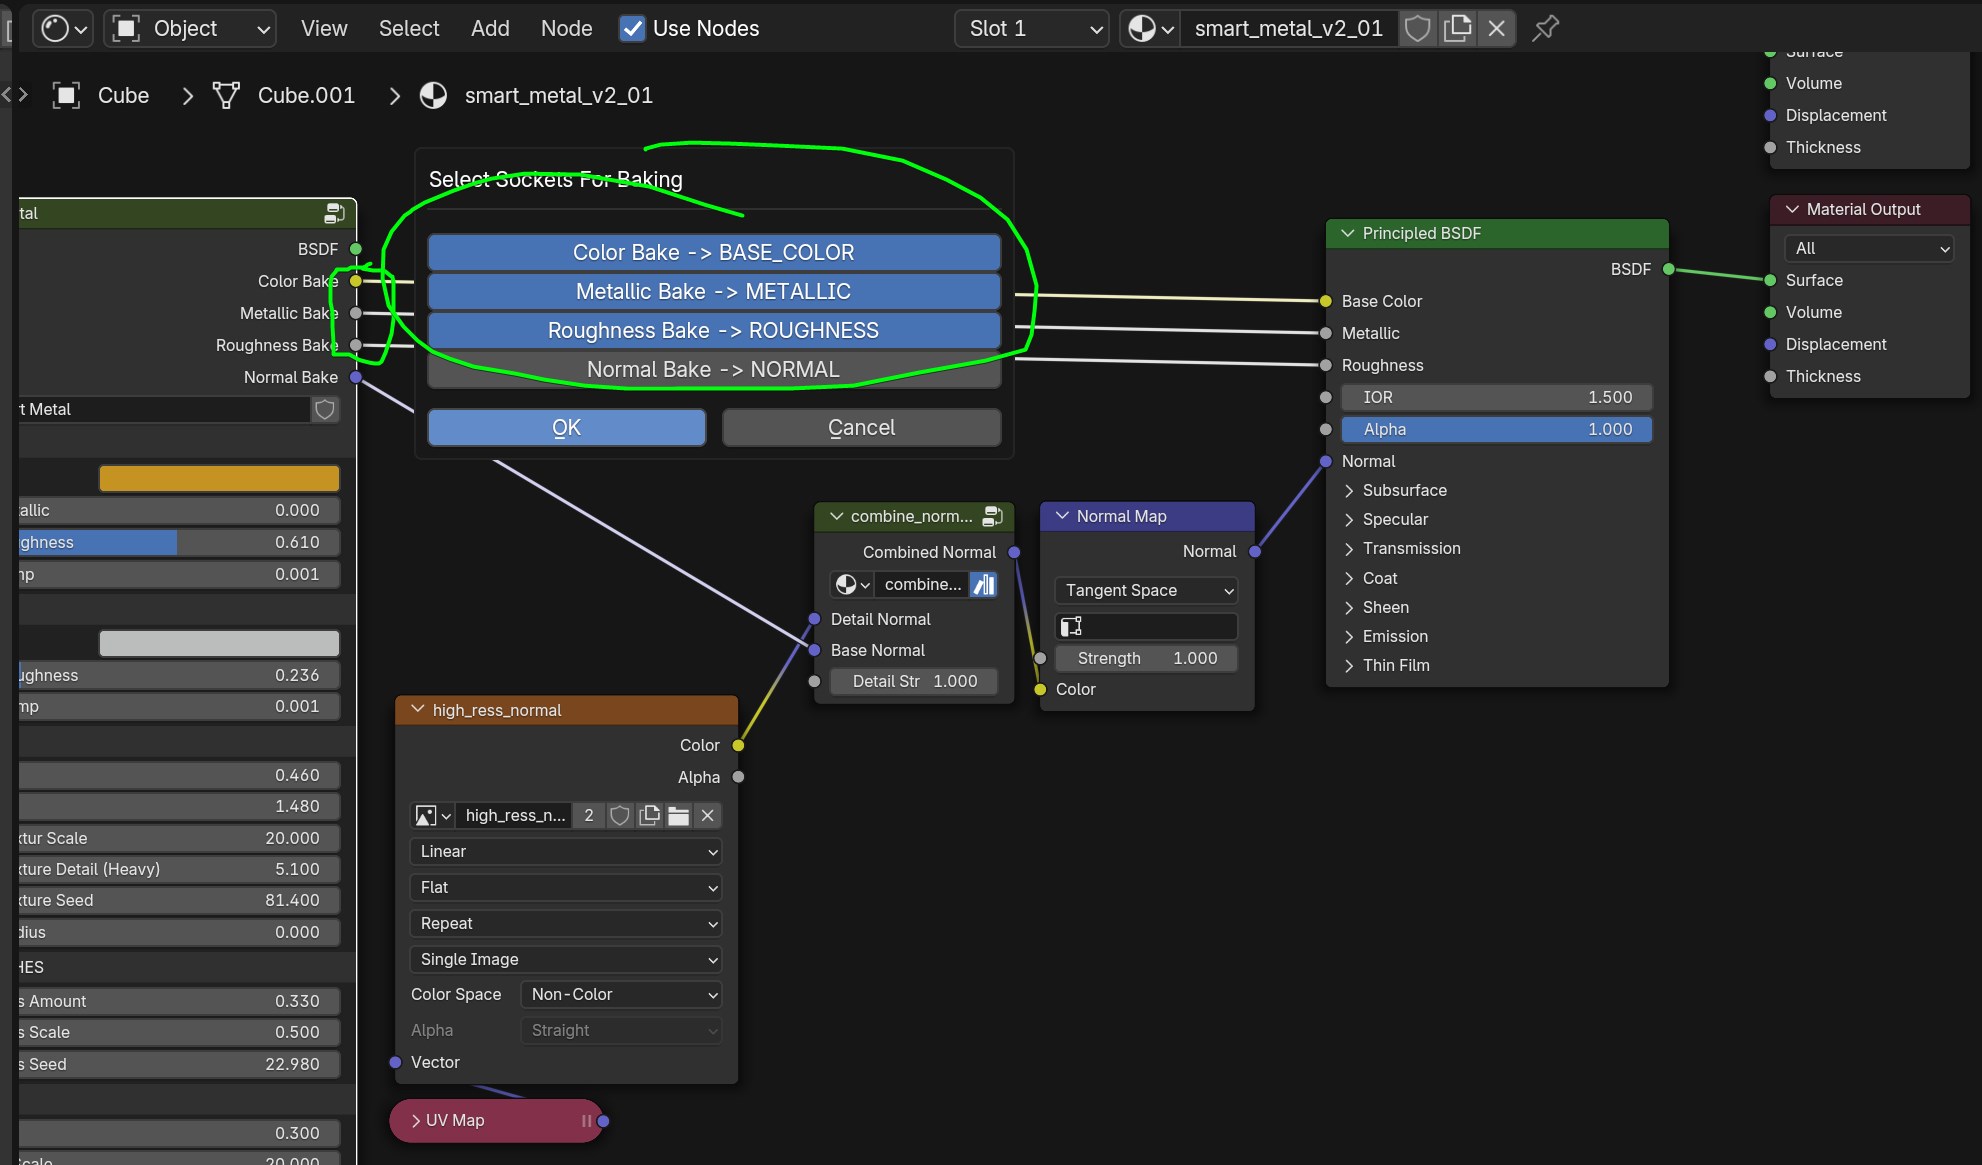
and the Normal Map from the "Combine Normal" node:
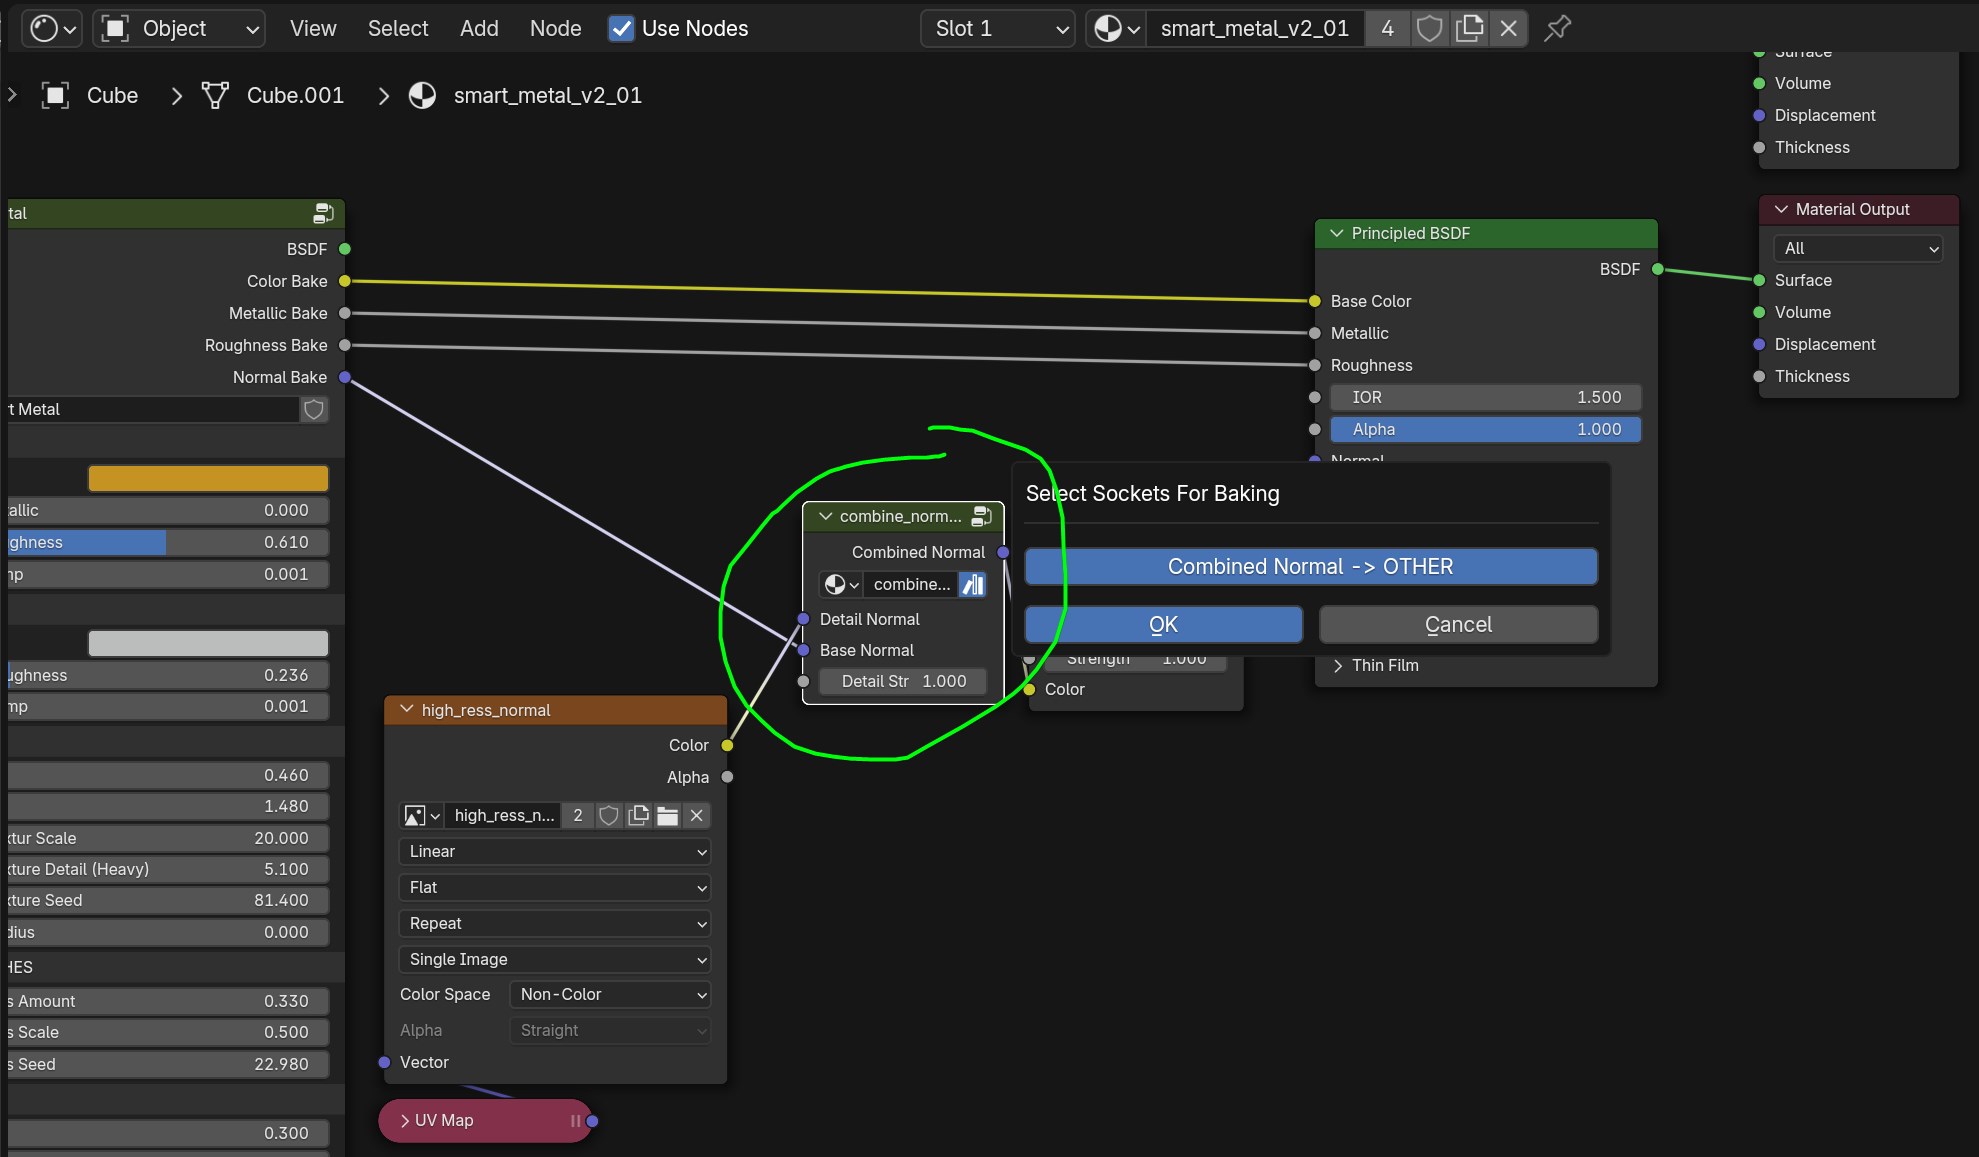
Tip
If you want the bake tool to automatically recognize and instance the nodes for the Normal Map bake, switch the Combined Normal map type in the Gear Icon from Other to Normal.
Once baked, you will have a PBR set of textures with the combined normals.
Auto-Populate with Combine Normal
If you're using the Auto-Populate from Material feature, the engine will detect the Normal input on the Principled BSDF. For the Combine Normal workflow, use the Manual Socket Selection method and select the Combine Normal node's Vector output as the Normal map source.