Custom Texturing (Advanced)
Introduction
We will be using a single material to texture your tiles with variation between them
If you uncheck the "Replace Material" parameter on any of the roof generators, you will see a different texture in the tiles that variates between them (they are not all the same) even if they are instances and use the same material
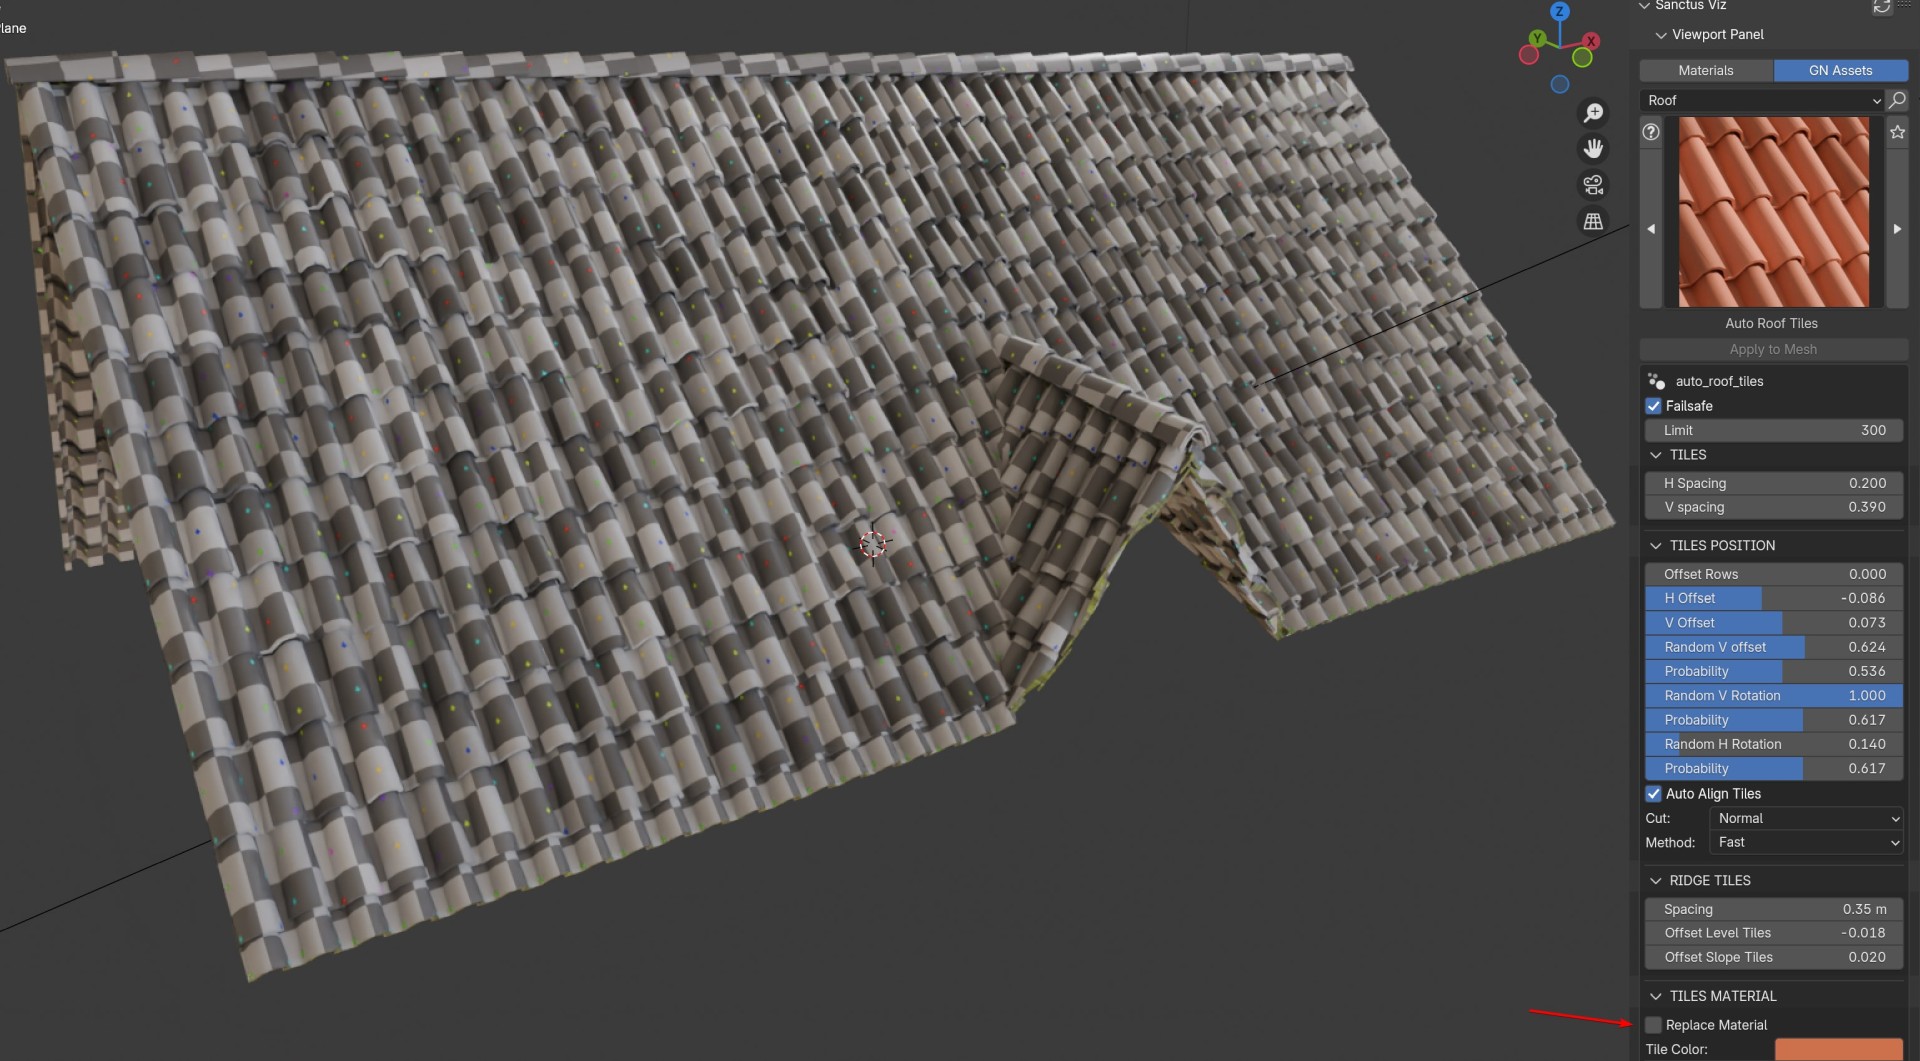
This way you can use a single PBR or Procedural material to texture your tiles with variation between them
The original material is called "example_custom_material" can have a suffix (.001) if you added more instances of the roof tool.
The example has just one texture image but I will show you how you can setup a material using the same nodes and how to control them.
Original example material
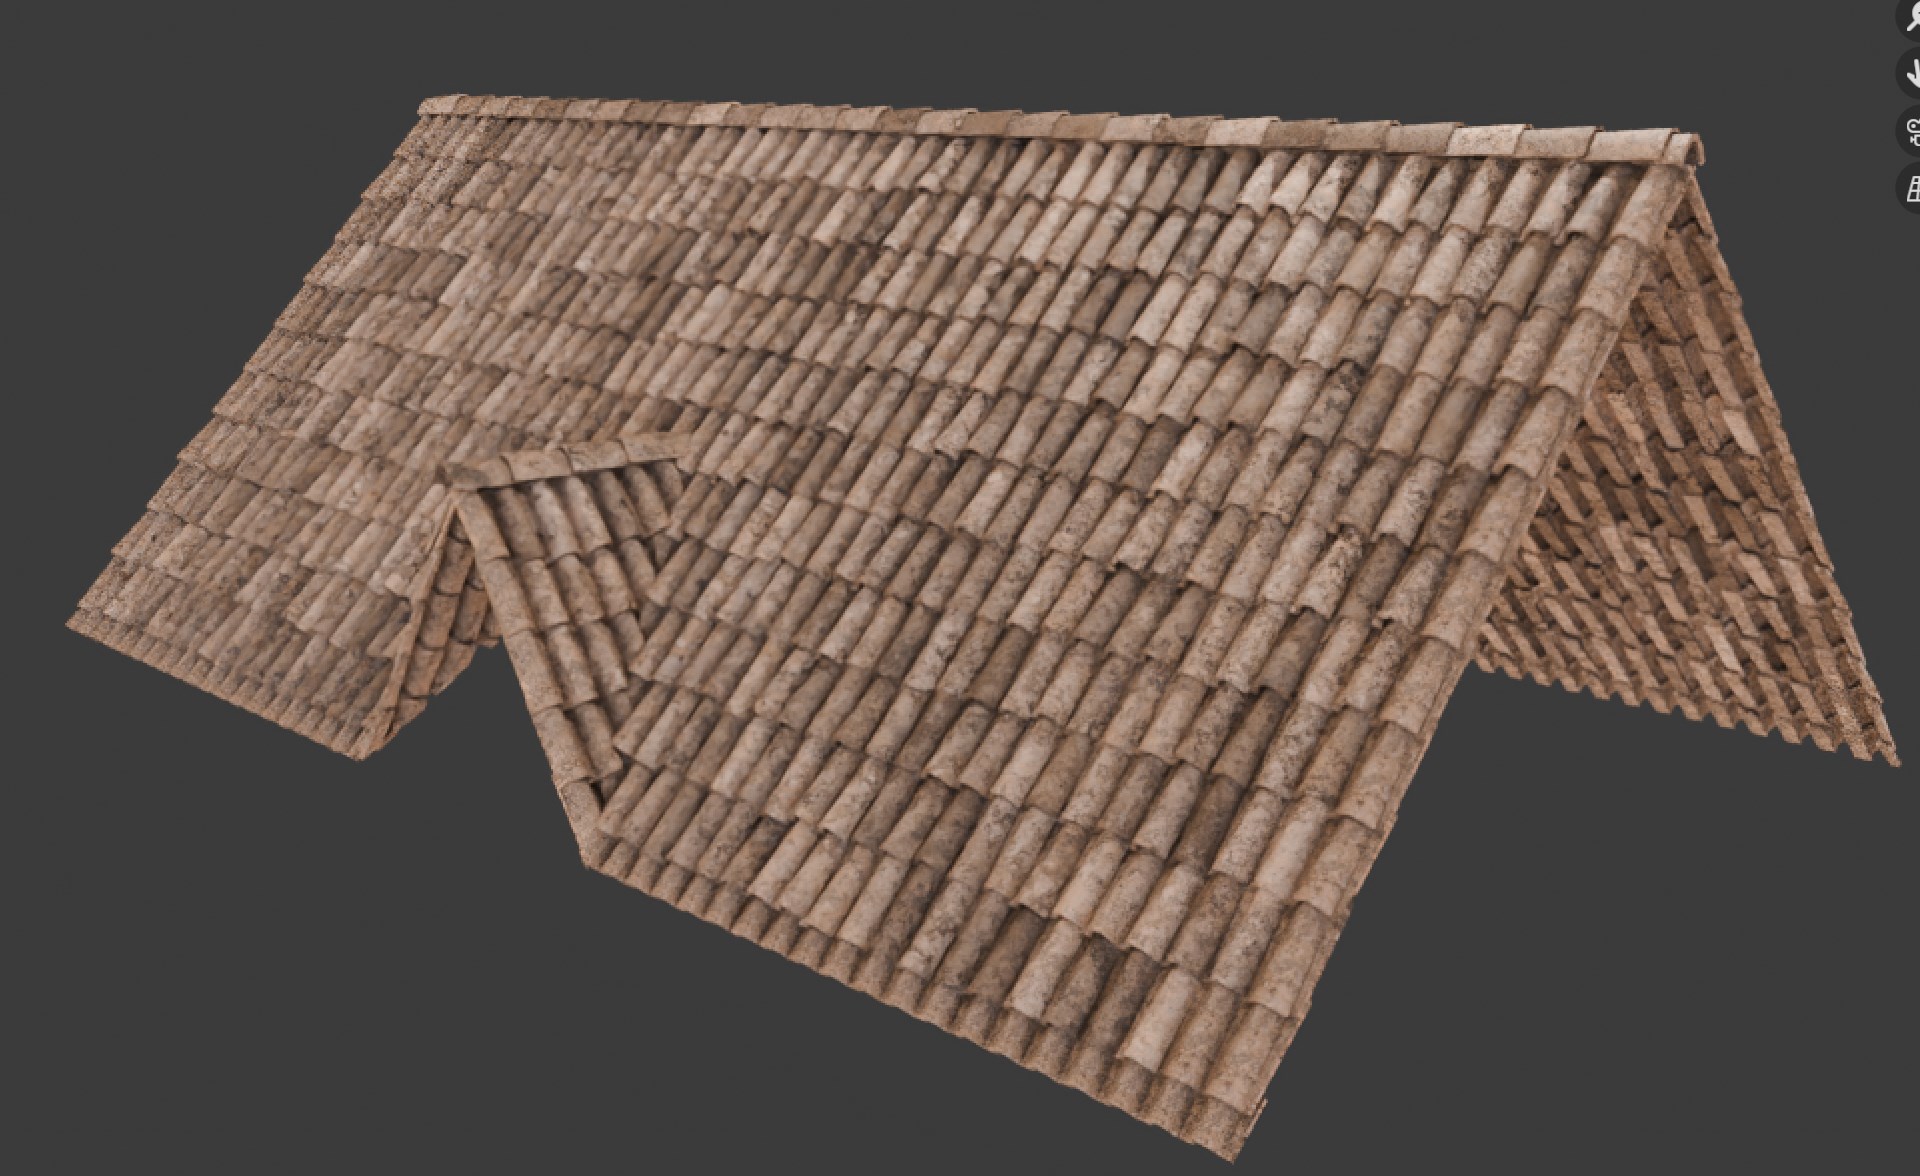
Here I used a moss wood pbr material to texture the regular clay tiles
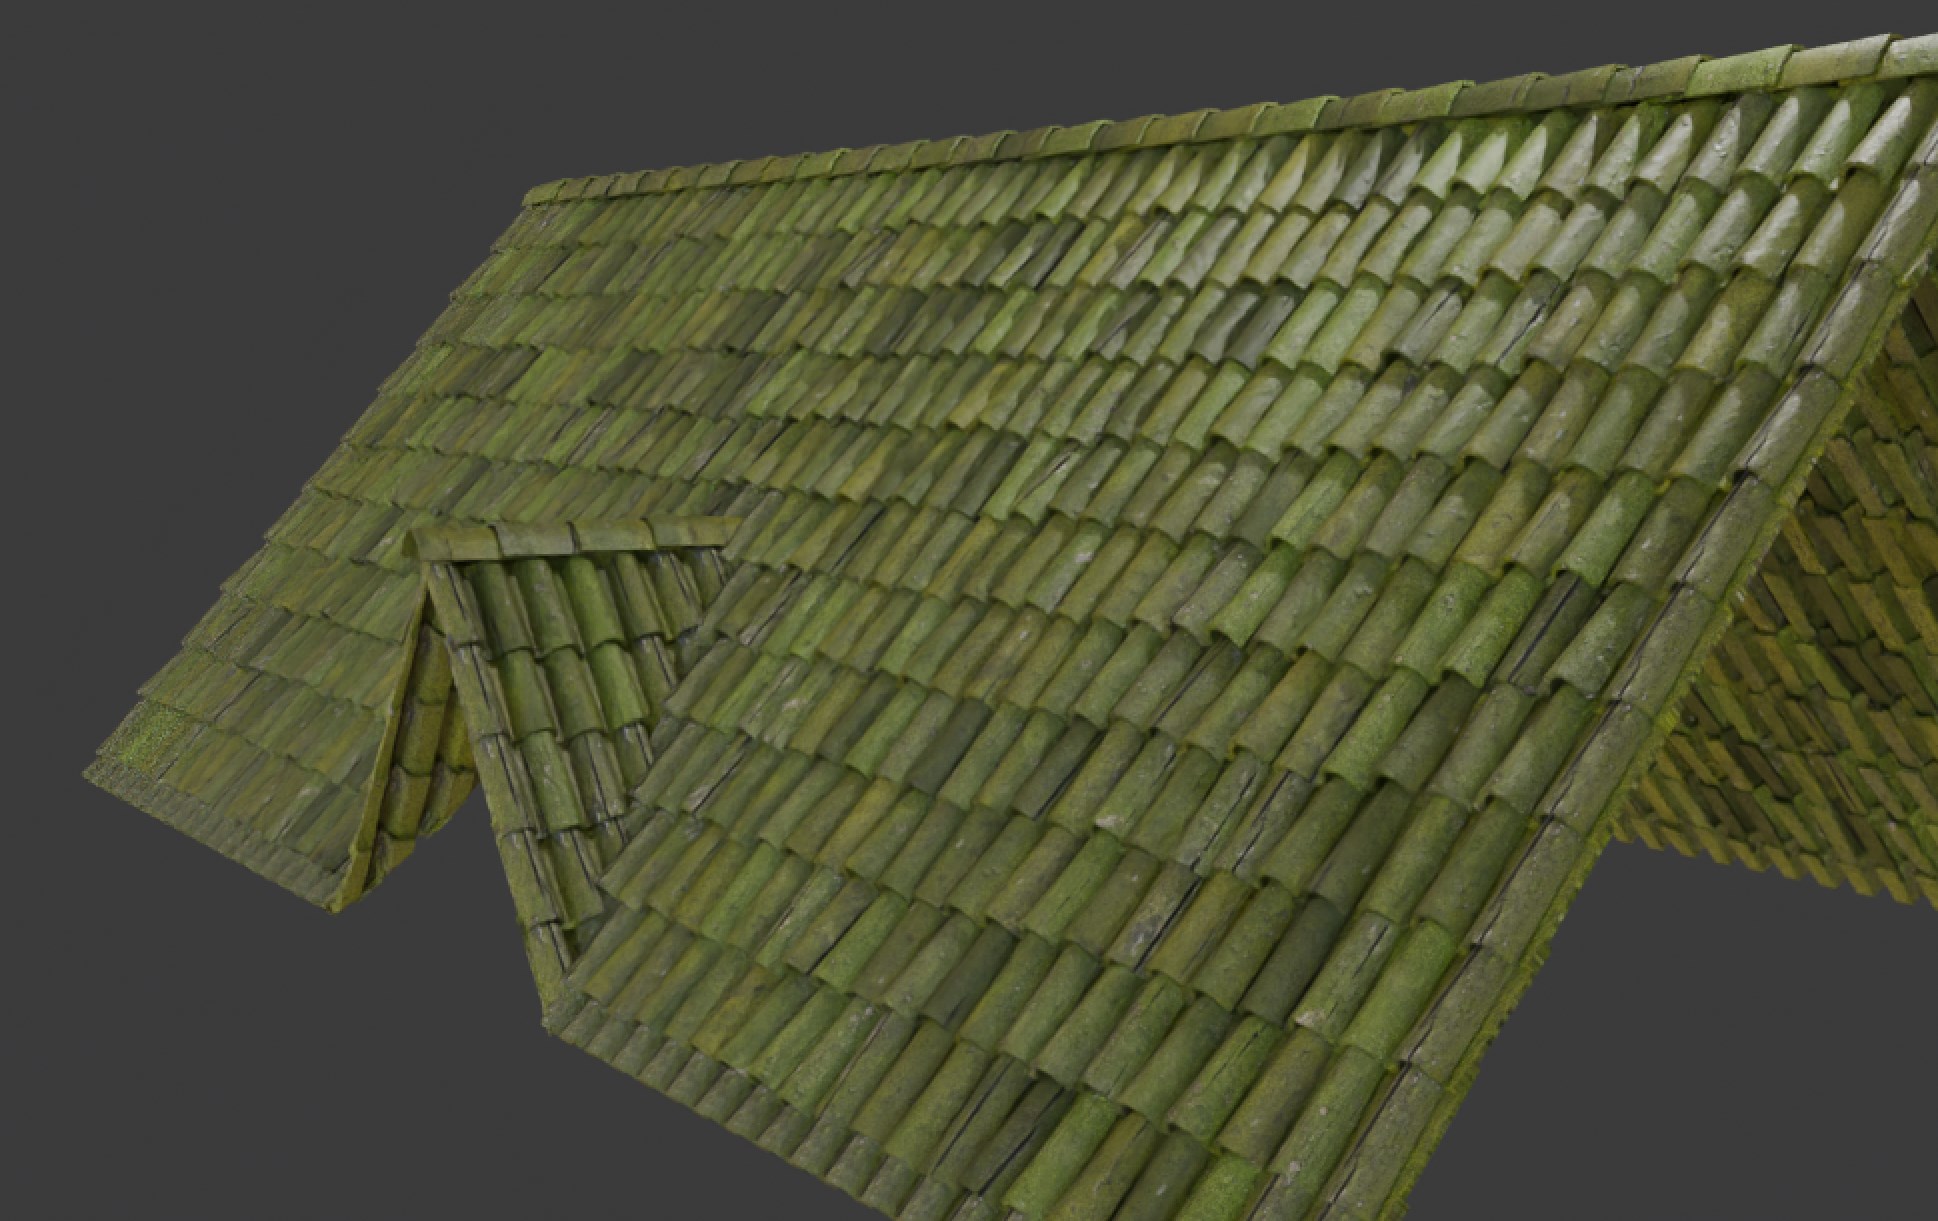
As you can see each tile has a different texture, color and variation.
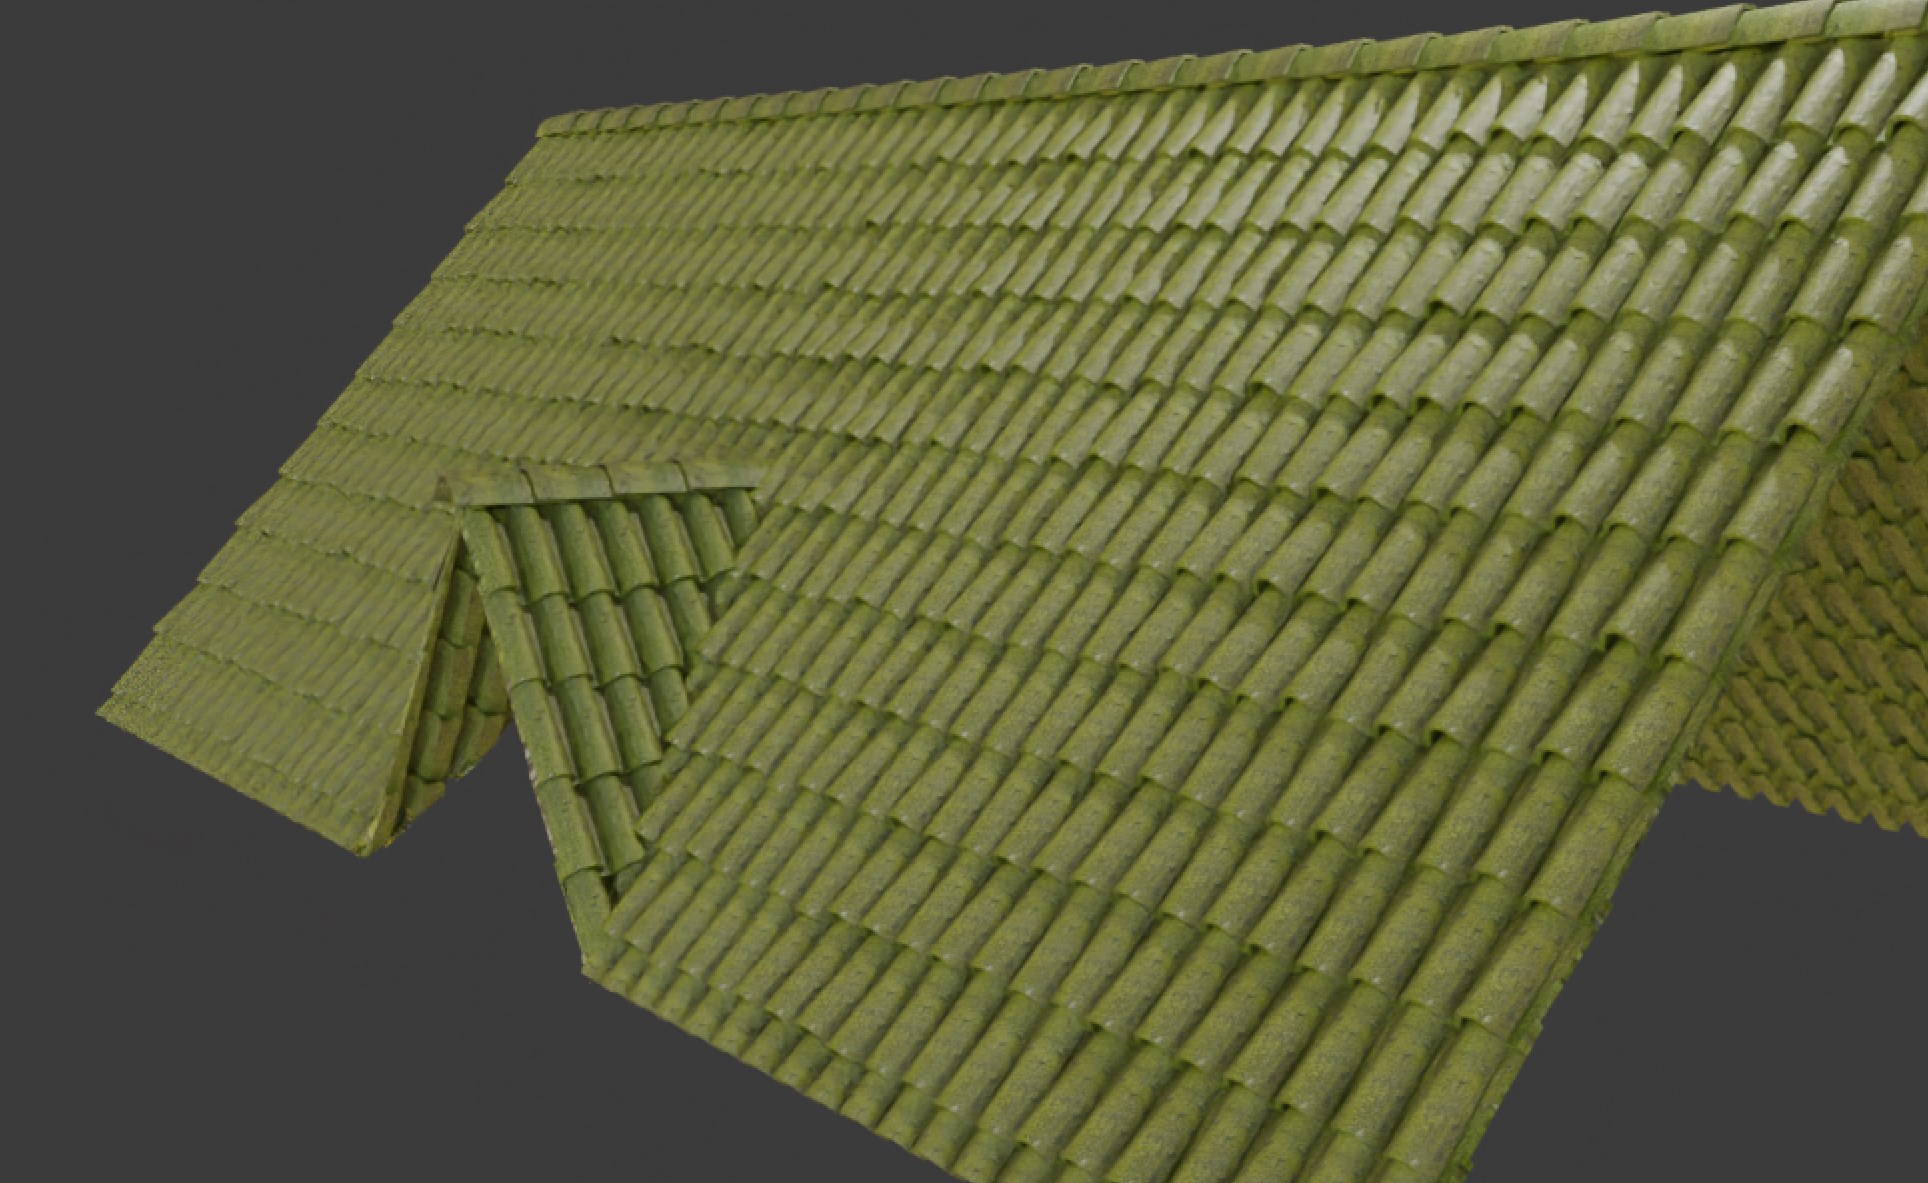
This is how it would look without the custom material:
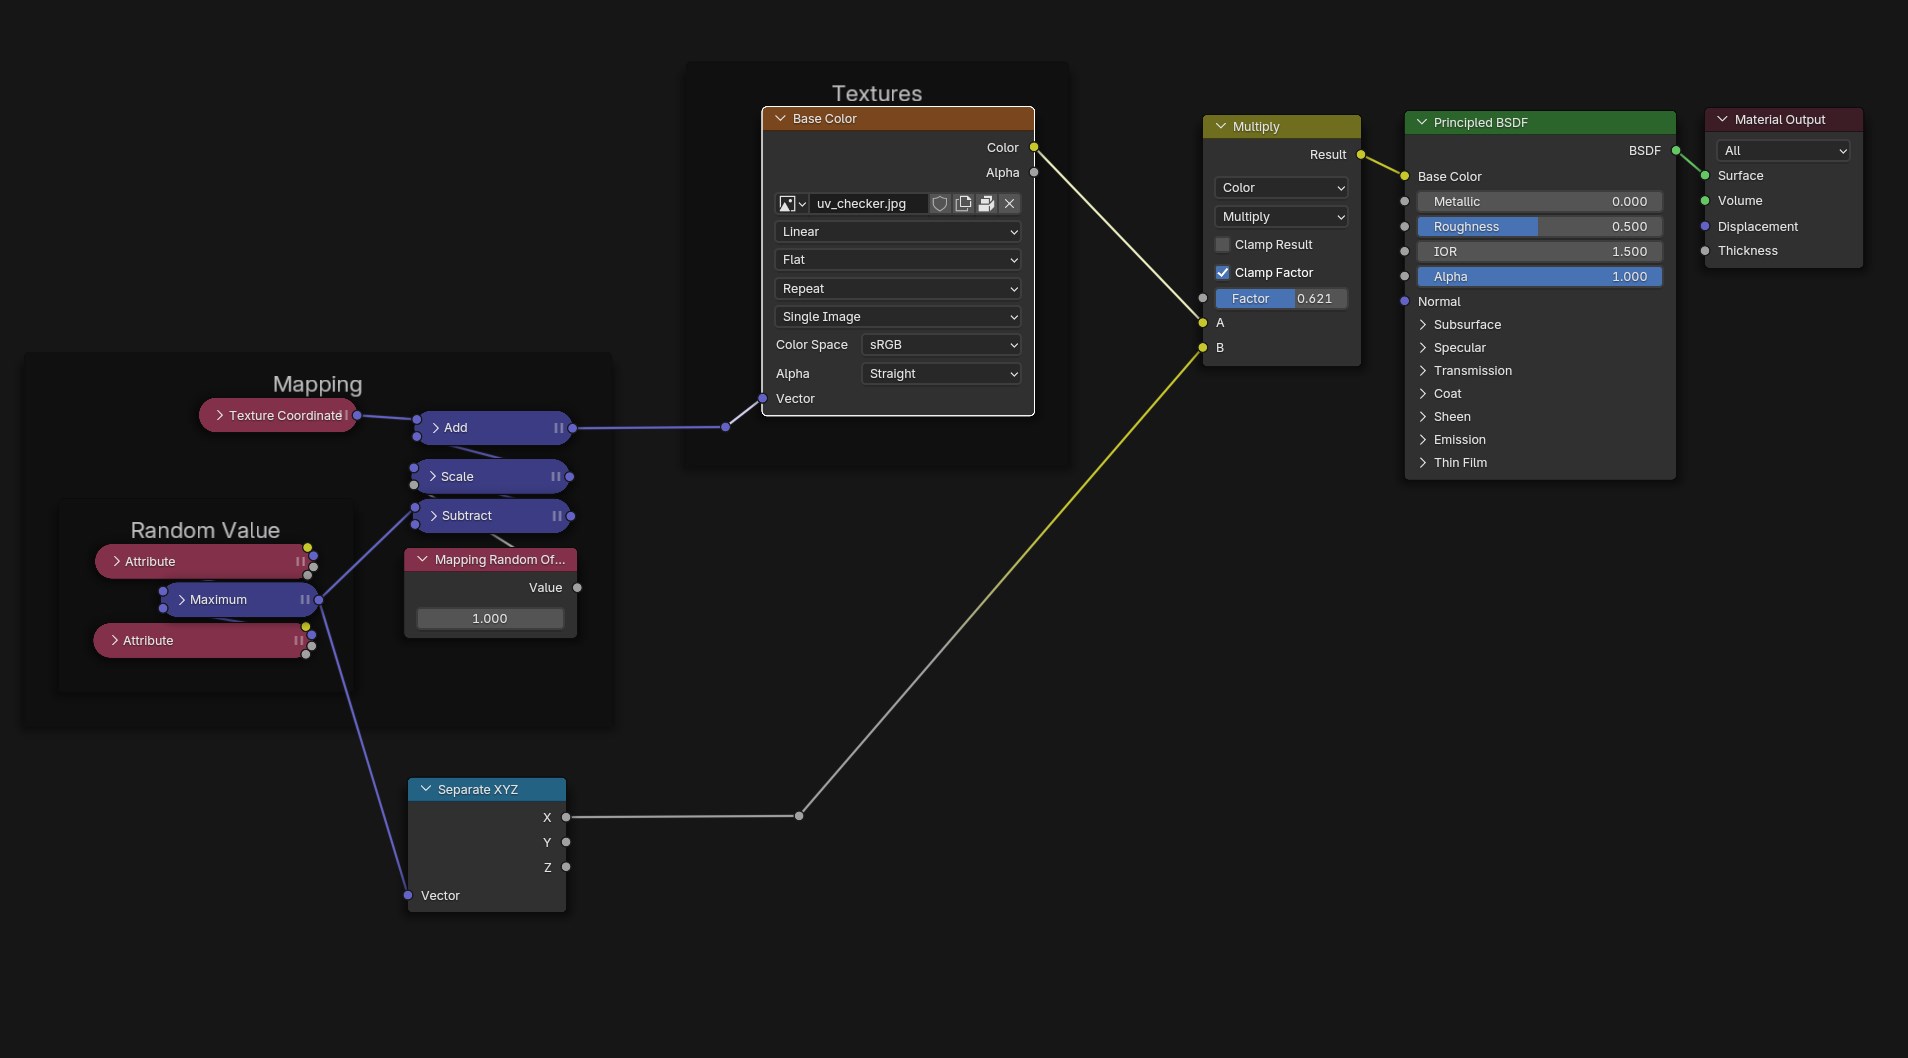
Identifying the node setup elements
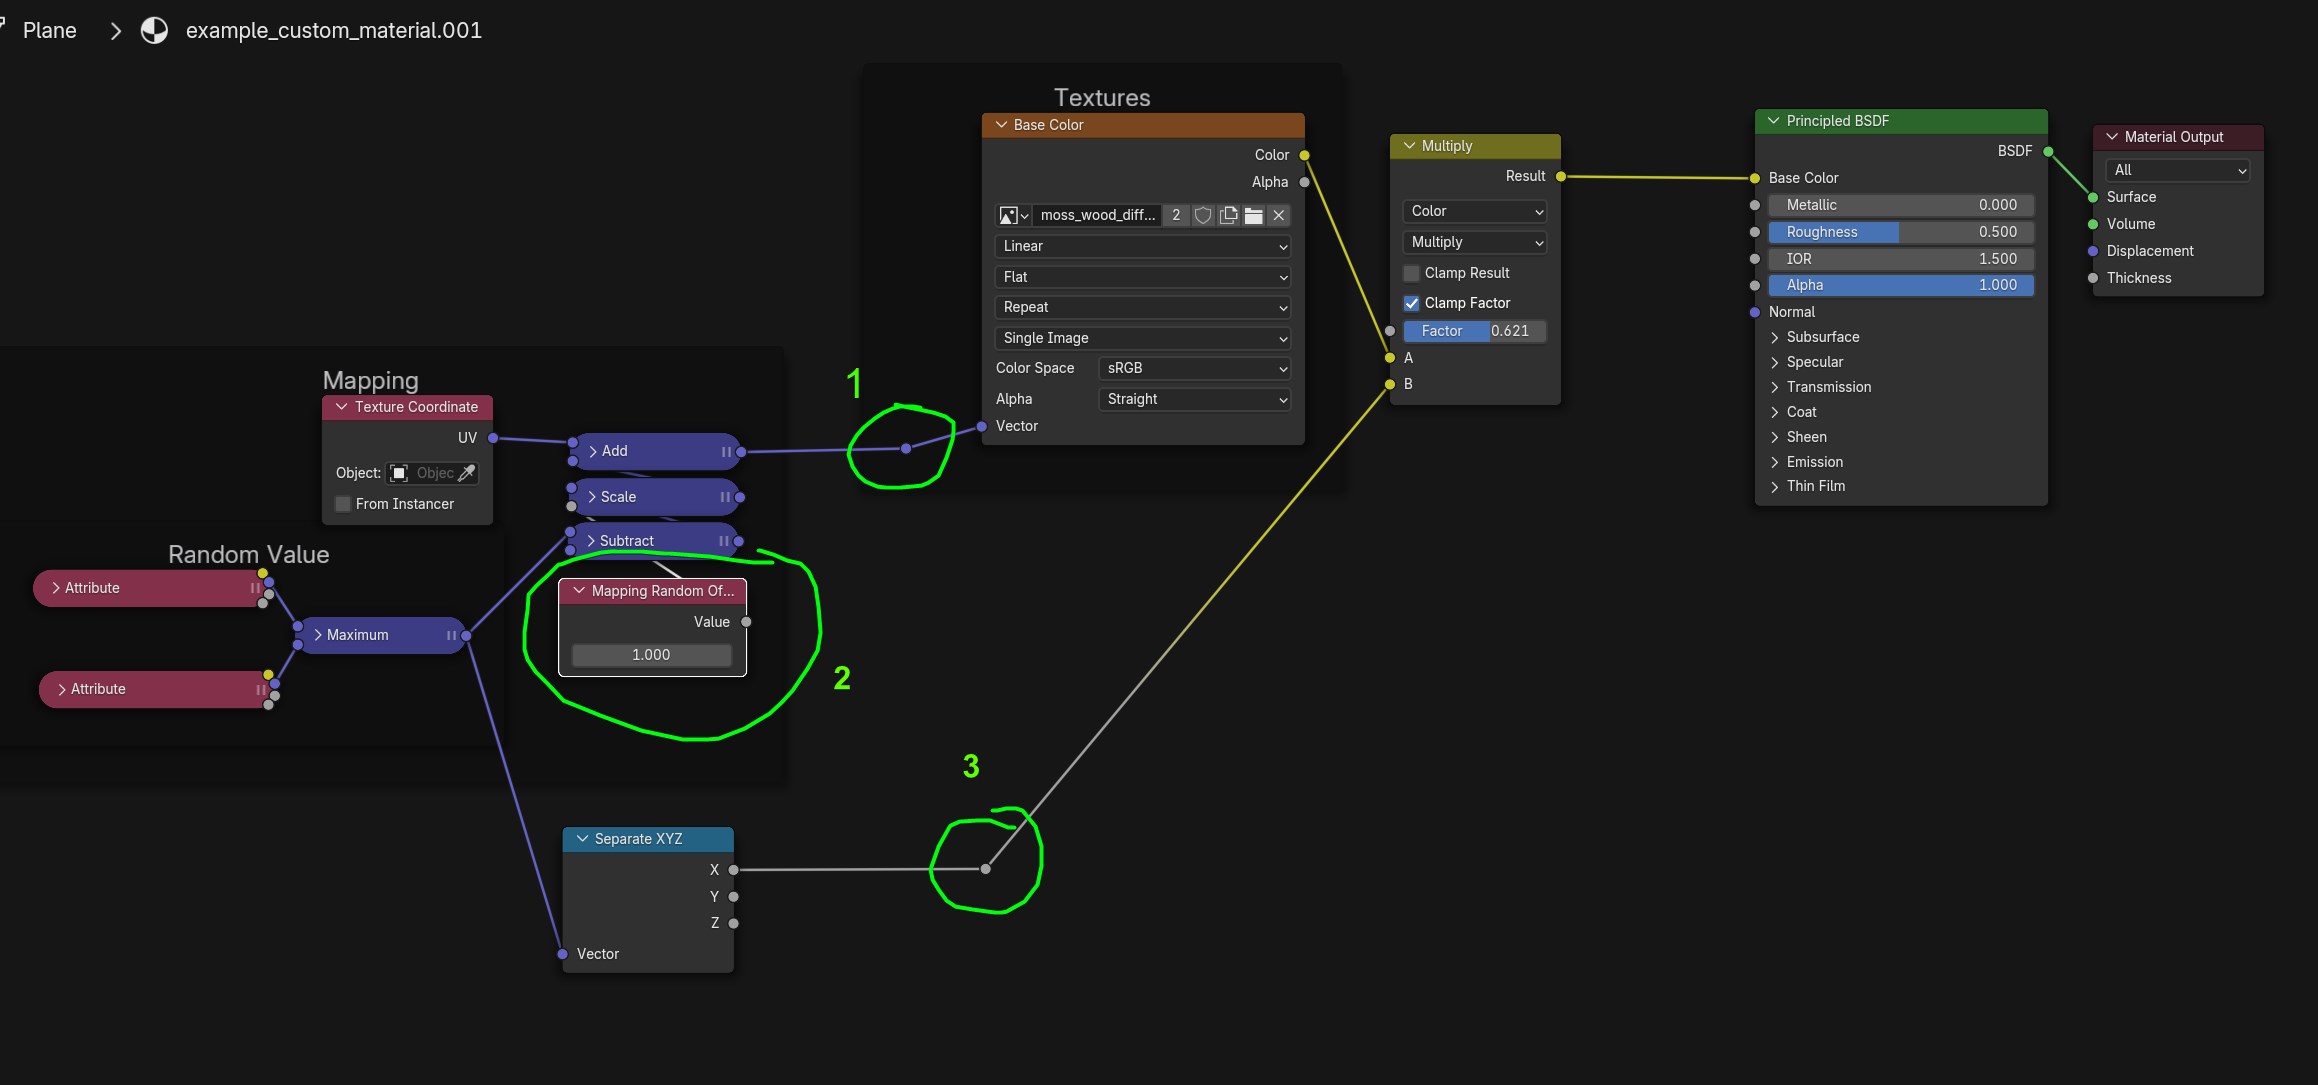
- This is basically your UV Coordinate, you will plug it on any image texture node you want to use
- A parameter that increases the difference between tiles by offsetting the uv map randomly (at 0 all tiles will be the same)
- A random value between 0 and 1 for each tile
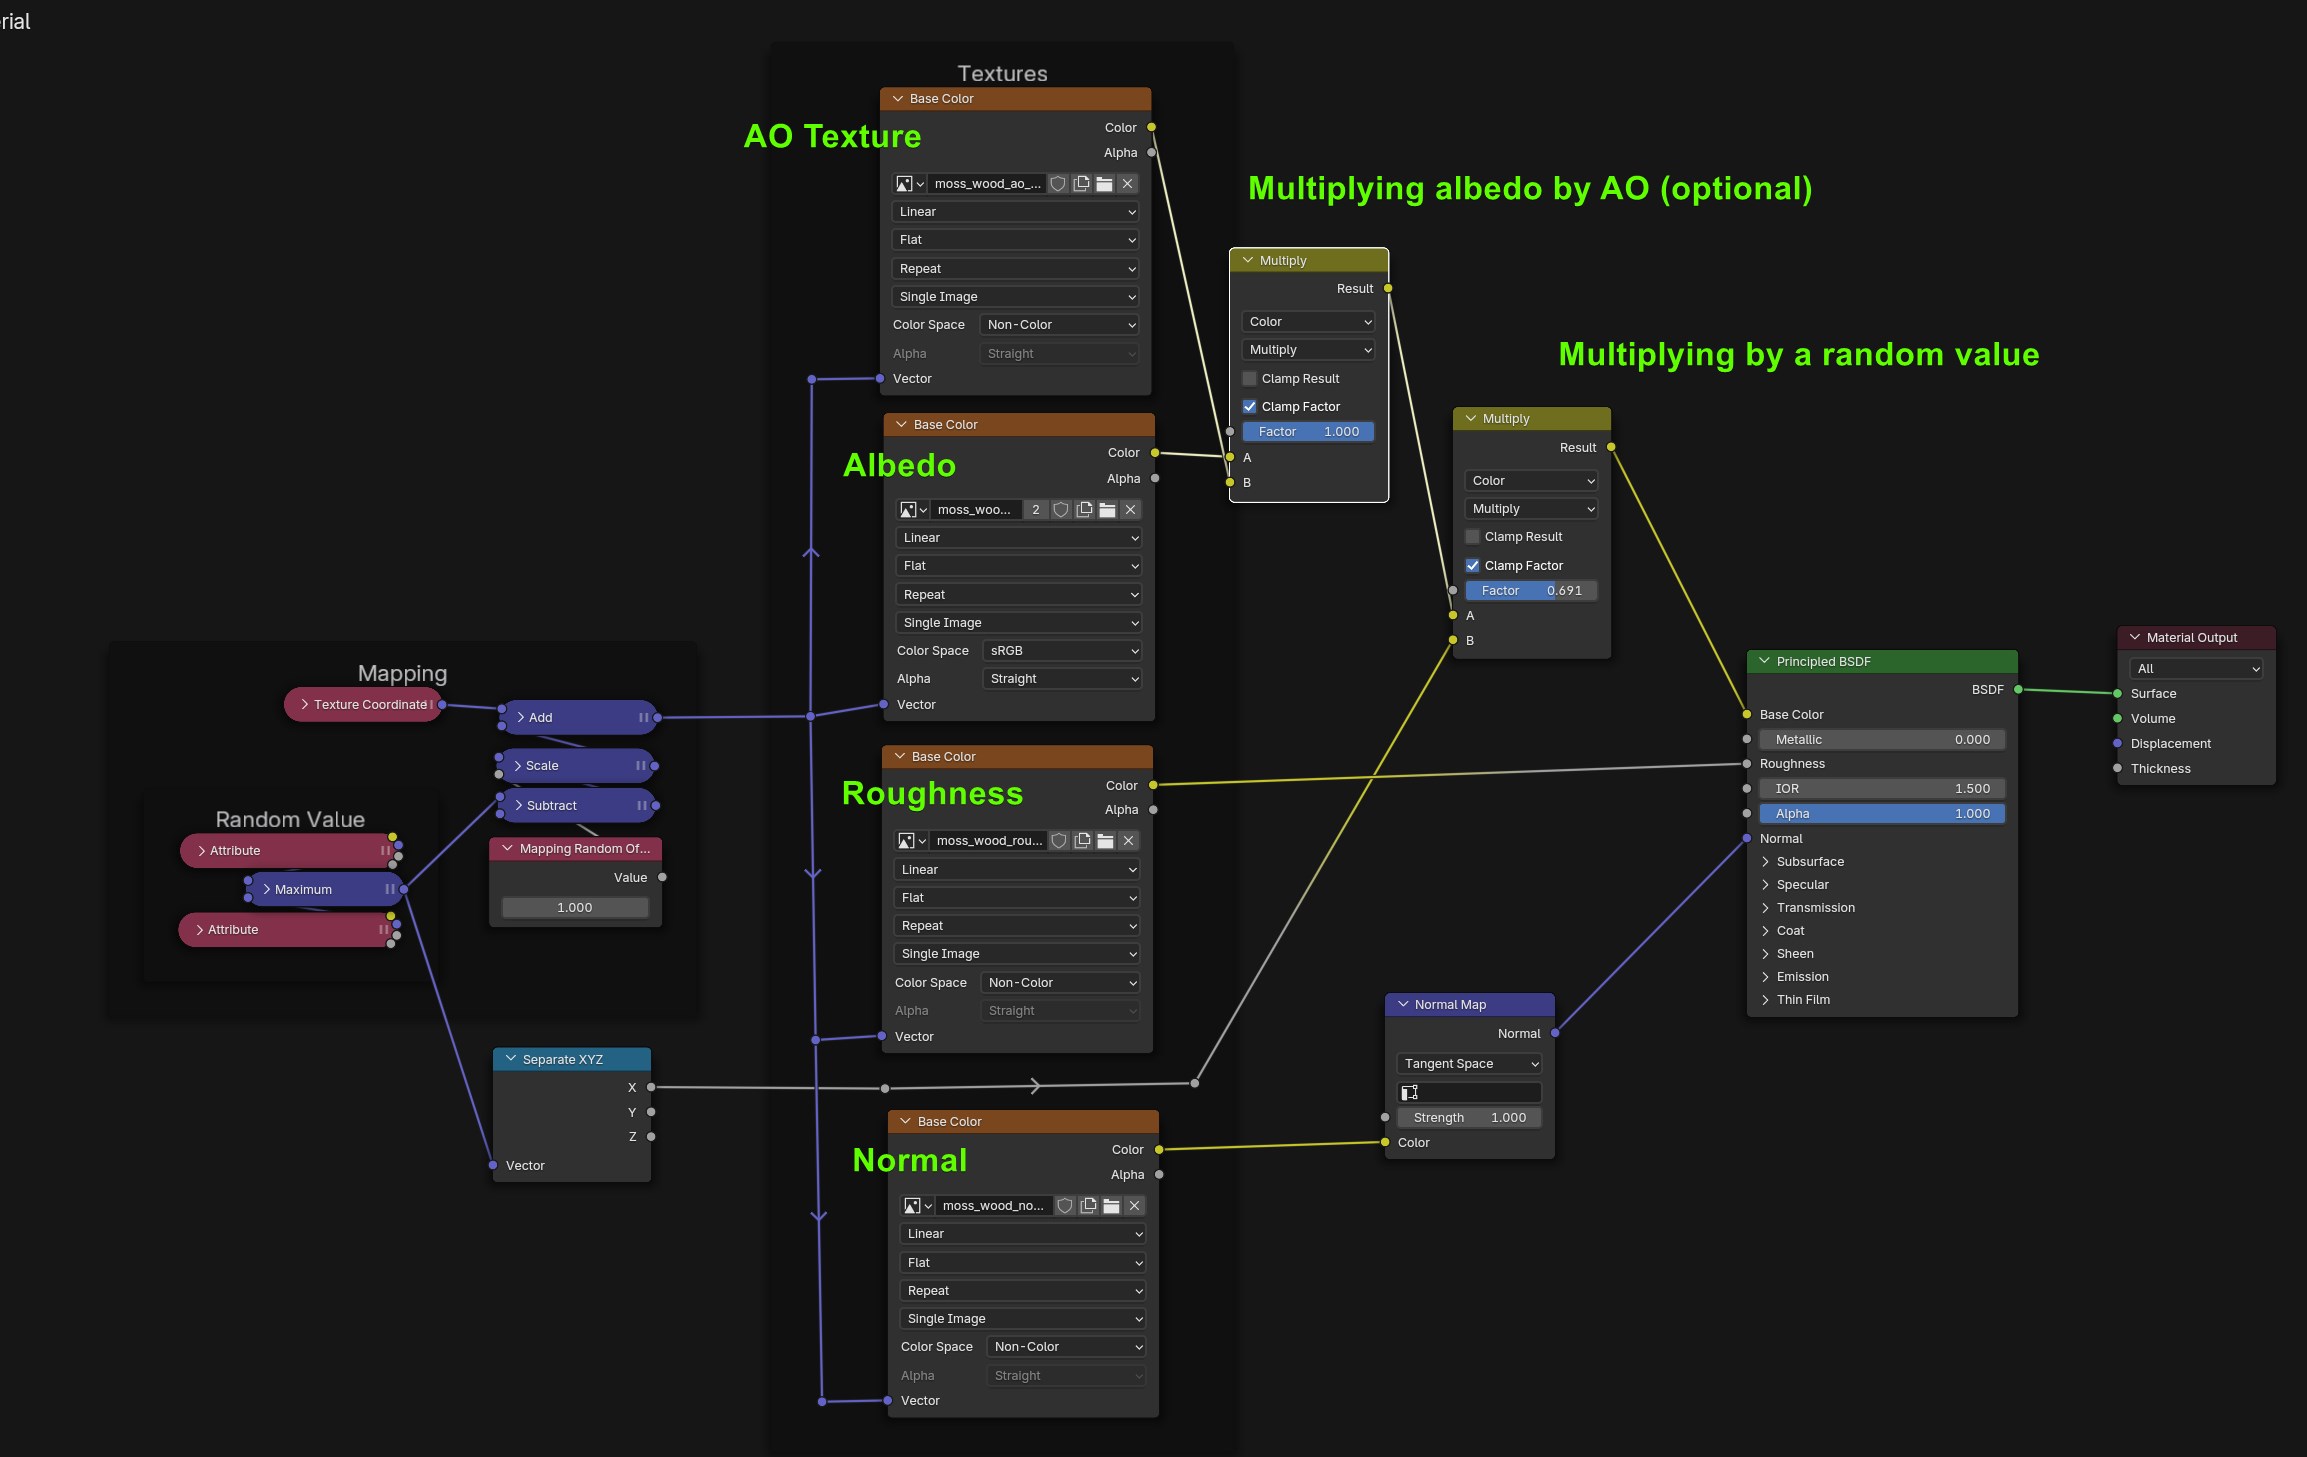
Creating a PBR Material
Using this we can now create a full PBR material for the tiles (this is the one I used in the moss wood tiles)
Creating a Procedural Material
In my case I selected a procedural material from Sanctus Library and used the "import Material" button.
Then I copied the group node of that material and pasted it in the "example_custom_material"
Result
Nodes
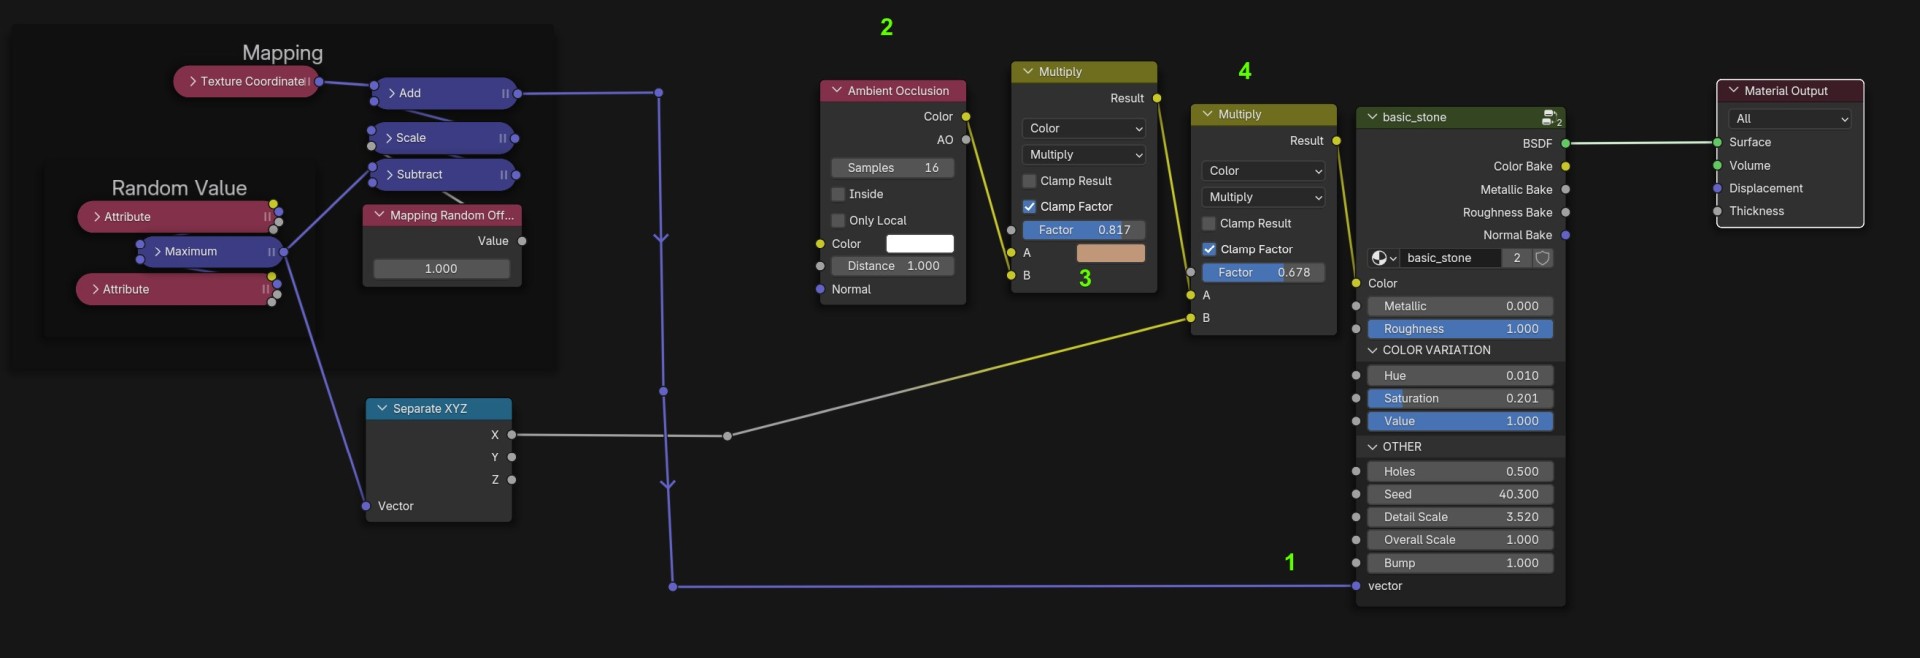
- We use the vector to replace the one used by the procedural material
Since the procedural material does not have access to the different tiles, we will create the color before and plug it into the color input to add variation and ambient occlusion. - I'm using an Ambient Occlusion node to multiply the color
- This is where I set the actual material color and the factor is how strong the AO will be
- I'm multiplying the resulting color by a random value to add a bit more variation between tiles