Video Tutorial:
Baking Decals
A new baking system was implemented in Sanctus Library 3.1 to automate the process of combining Decal and Material bakes, and to facilitate the instantiation of baked textures in the shader editor.
After you've applied and adjusted the decal parameters, you can bake them combined with the object's material.
Simply enable the Bake Decals checkbox, bake the object's material, and the decals will be baked along with it.
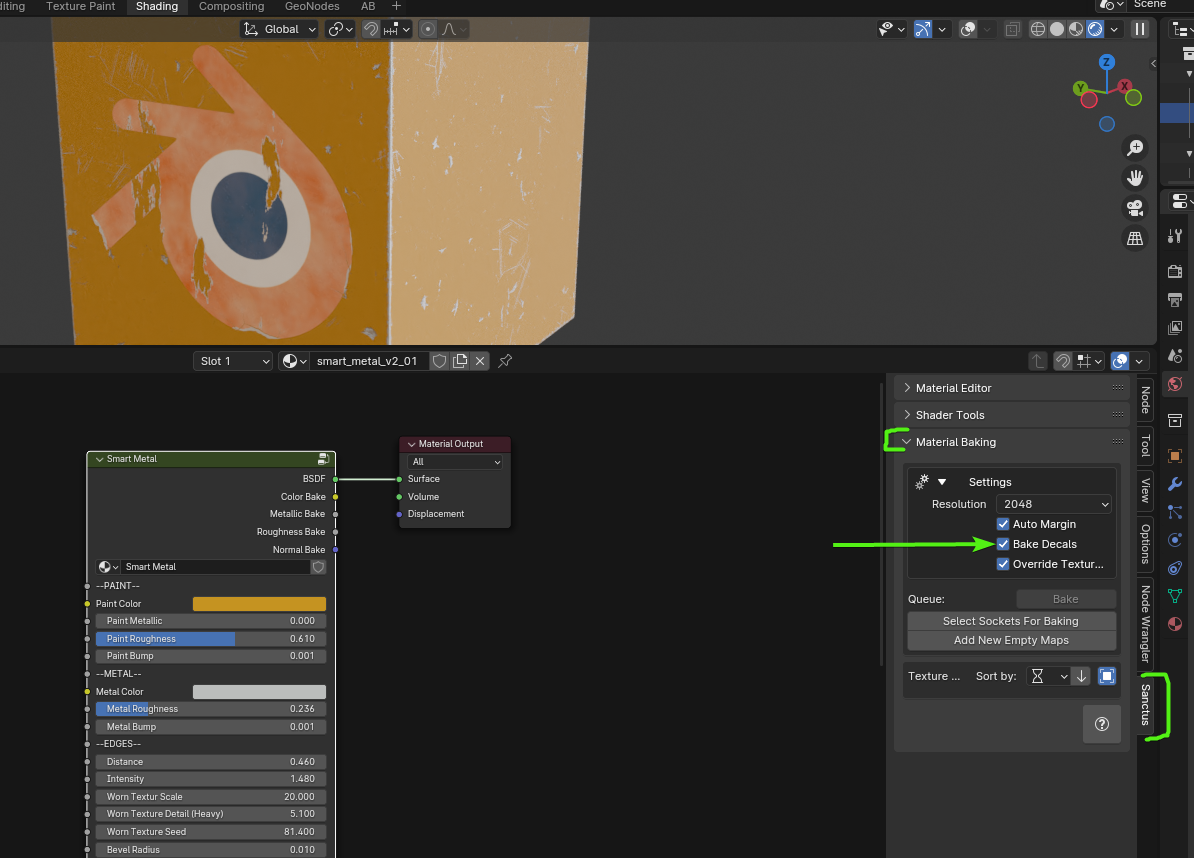
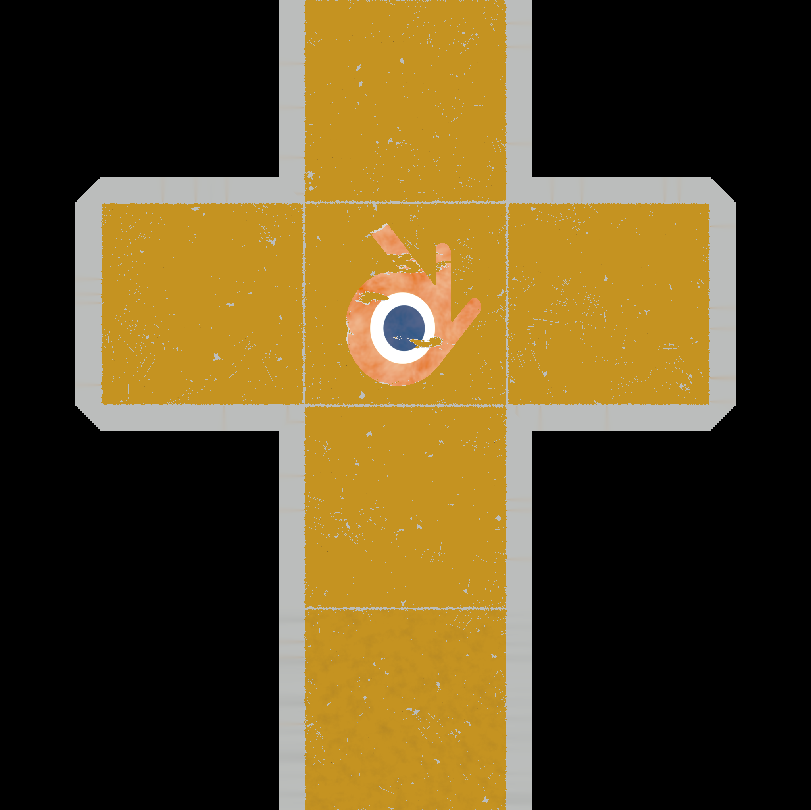
In this example, the object has a Smart Metal Material and one Blender Logo Decal.
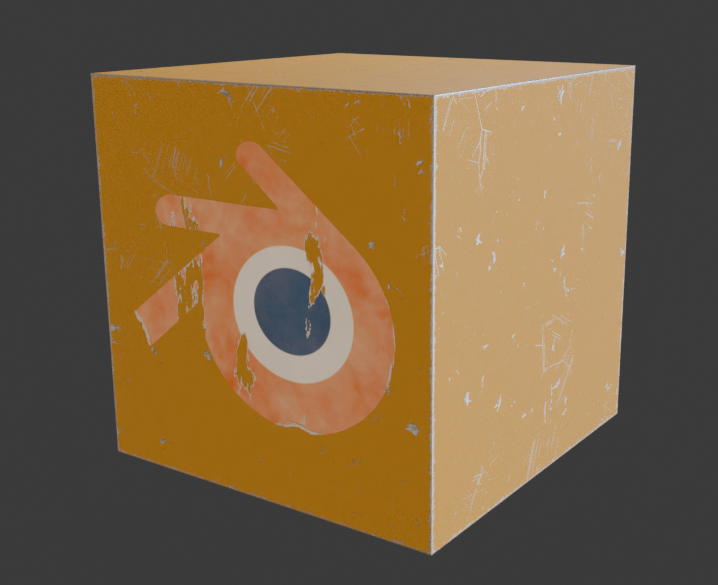
When baked with the checkbox active, the result is:
Decal Inherits Surface Normal
When the Inherit Normal option is enabled, decal normals blend with the underlying surface normals instead of completely overwriting them. This prevents decals from looking perfectly flat when baked over irregular or textured surfaces.
The engine performs a normalized vector addition in tangent space:
$$\vec{N}{\text{final}} = \text{Normalize}(\vec{N})$$}} + \vec{N}_{\text{target}
This allows micro-details like grain, concrete noise, cracks, or bumps on the wall to realistically warp the decal texture passing over it.
When to use Inherit Normal
- Enable when baking decals over rough or textured surfaces (concrete, brick, wood, fabric).
- Disable when baking decals over perfectly flat surfaces or when you want the decal to completely override the surface normal.
Baking Emission Maps
Pro Tip
This section describes how to bake emission maps from decals when the object's base material doesn't have an emission map.
My decal has Emission but the object's material doesn't. How do I bake that map?
If your decal uses maps that your material doesn't, you need to add the missing map to the bake queue.
Click the Add New Empty Map button and select the missing maps that you want in the baking job. In this case, the Emission Map.
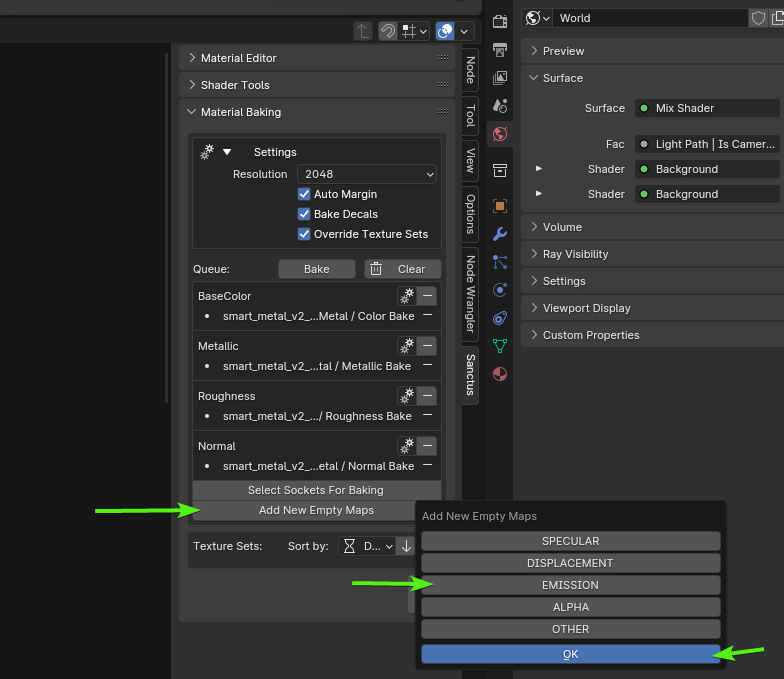
Now when you bake, the emission map of the decal will be baked as a new texture.